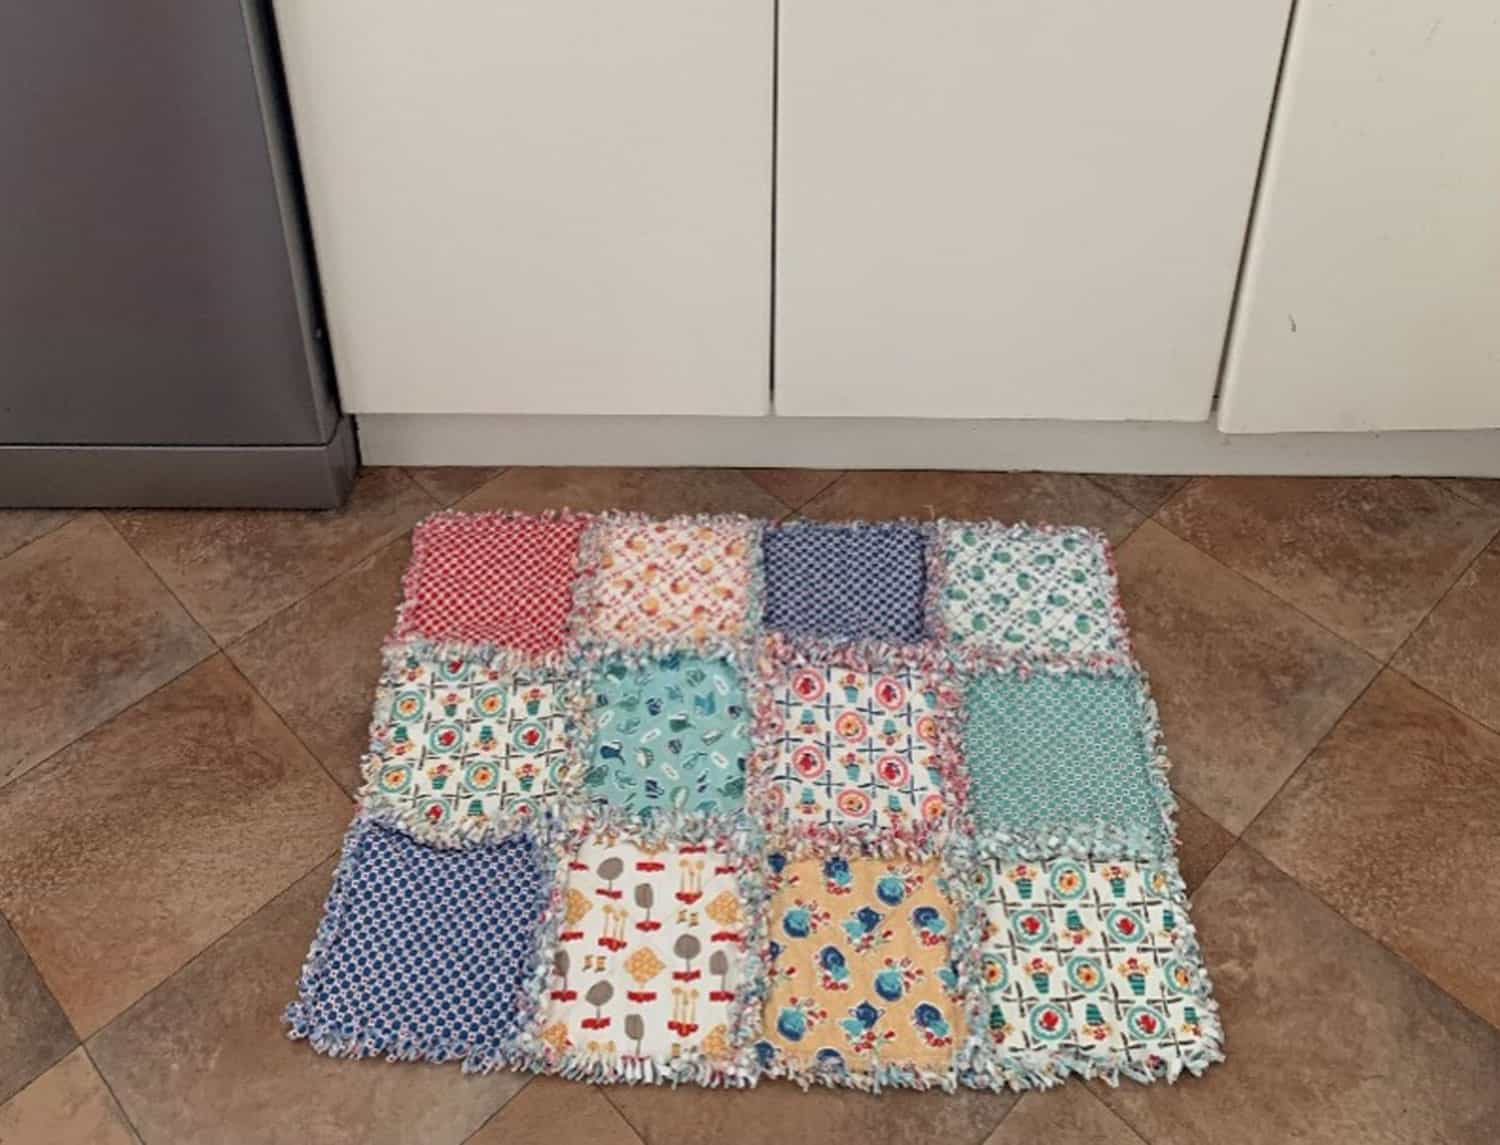
How about adding some more rags to your kitchen with a matching raggy mat?
This is just another way to make the most of your scraps, or old clothes! I love cutting up jeans to add to my raggy mats and even adding non-slip lining – please see the options at the end of the pattern!
Let’s Make a Raggy Mat!
Materials:
- AccuQuilt GO! Big or GO! Fabric Cutter
- AQ55013 GO! Rag Square – 8 ½”
- AQ55000 GO! Square – 6 ½” (6” finished)
- GO! Cutting Mat – AQ55111 (10” x 10”)
- Assorted scraps or 6 fat quarters
- Scraps of batting
- Sewing Machine
- Matching Sewing Thread
- General Sewing Tools
- Optional: Walking foot
Cutting Instructions:
- From assorted scraps or 6 fat quarters:
- Using AQ55451 GO! Rag Square – 8 ½”
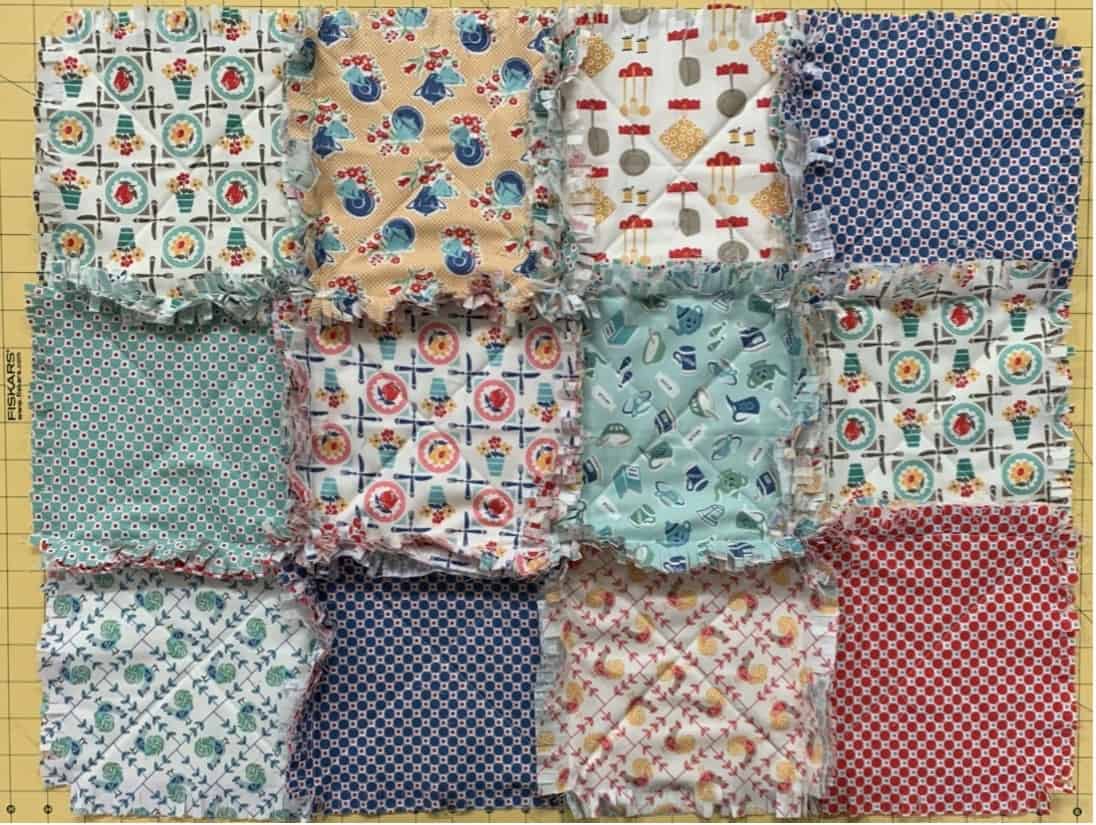
- Cut (24) rag squares from assorted scraps or fat quarters
- Using AQ55000 GO! Square – 6 ½”
- Cut (12) squares of batting (only cut two layers at time)
- Using AQ55451 GO! Rag Square – 8 ½”
Sewing Instructions:
All seams are ¼” unless otherwise specified.Using a walking foot can help avoid the layers from moving in this project while you are sewing.
Sew The Squares:
- Place one square of batting in between two rag squares, right sides facing out.
- Sew a diagonal line from corner to corner. Cut thread. Sew another diagonal line between the other two corners.
Sewing the squares into rows:
- Lay the squares out in three rows of four.
- Start by taking the first two squares in the top row and sew them together, back-to-back. Sew slightly to the right of the batting. Remember the fringe will be facing up when the mat is finished.
- Keep sewing more squares together till the rows are finished.
Sewing the rows together:
This step can be a little bit daunting when you first try it. Just keep in mind that this is a very forgiving method where mistakes almost literally come out in the wash (or in this case the dryer!)
- Take two of the rows and place them back-to-back. Using pins, match the seams like you would in any other quilting project. Sew slightly to the right of the batting and don’t stress about where the cut edges fall, it will all look fine once it’s been through the dryer!
- Add the third row using the same method:
- Sew all around the edges of the mat to finish it off.
- If you want to add a non-slip lining, see the instructions below to do this. Otherwise, pop the mat in the washing machine and dryer and your mat will be ready to use!
Fabric Options:
Slightly thicker fabric, as opposed to quilting fabric, is also perfect for these kitchen mats, for example, unlined curtain fabric.
Cutting up old clothes like jeans is a great way to reuse what you have.
If you are using a thicker fabric, however, it’s recommended to cut fewer layers at a time to avoid damaging the die. I would only put through two layers at a time instead of the usual 6 layers of quilting cotton.
To make the Mat Non-Slip
I like adding a non-slip lining to the back of the mat, to avoid the mat sliding around the kitchen.
NB If you want to add this, do it before you wash and dry the mat!Rolls of the non-slip lining can be purchased at some supermarkets or household shops.
- Measure the length needed to cover the back of the mat and cut to size.
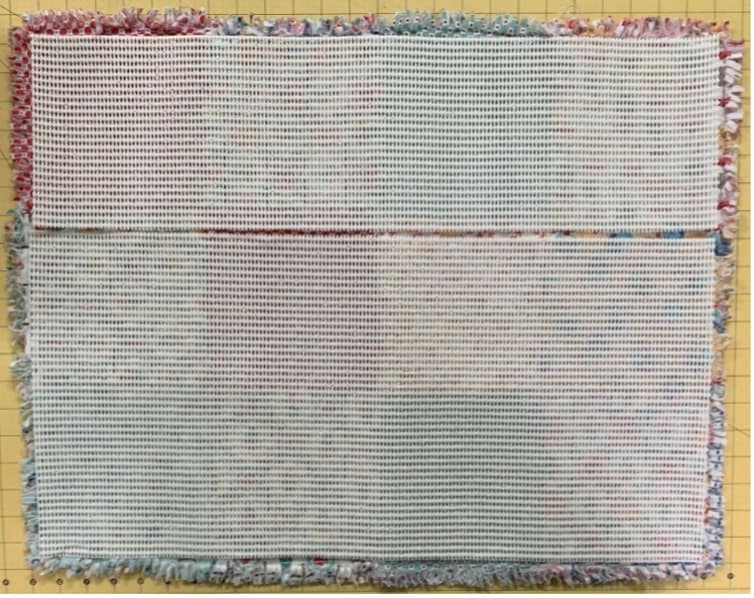
- Pin in place
- With the non-slip lining facing up, sew it to the back of the mat by stitching all around the outside.
- Turn the mat around and stitch on some of the horizontal lines that hold the rows together.
- Wash and dry the mat.
Sewing the non-slip lining can be a little bit tricky. Setting a longer stitch length helps and using a nonslip foot. Alternatively, just sew it on by hand using large stitches, it doesn’t take long!