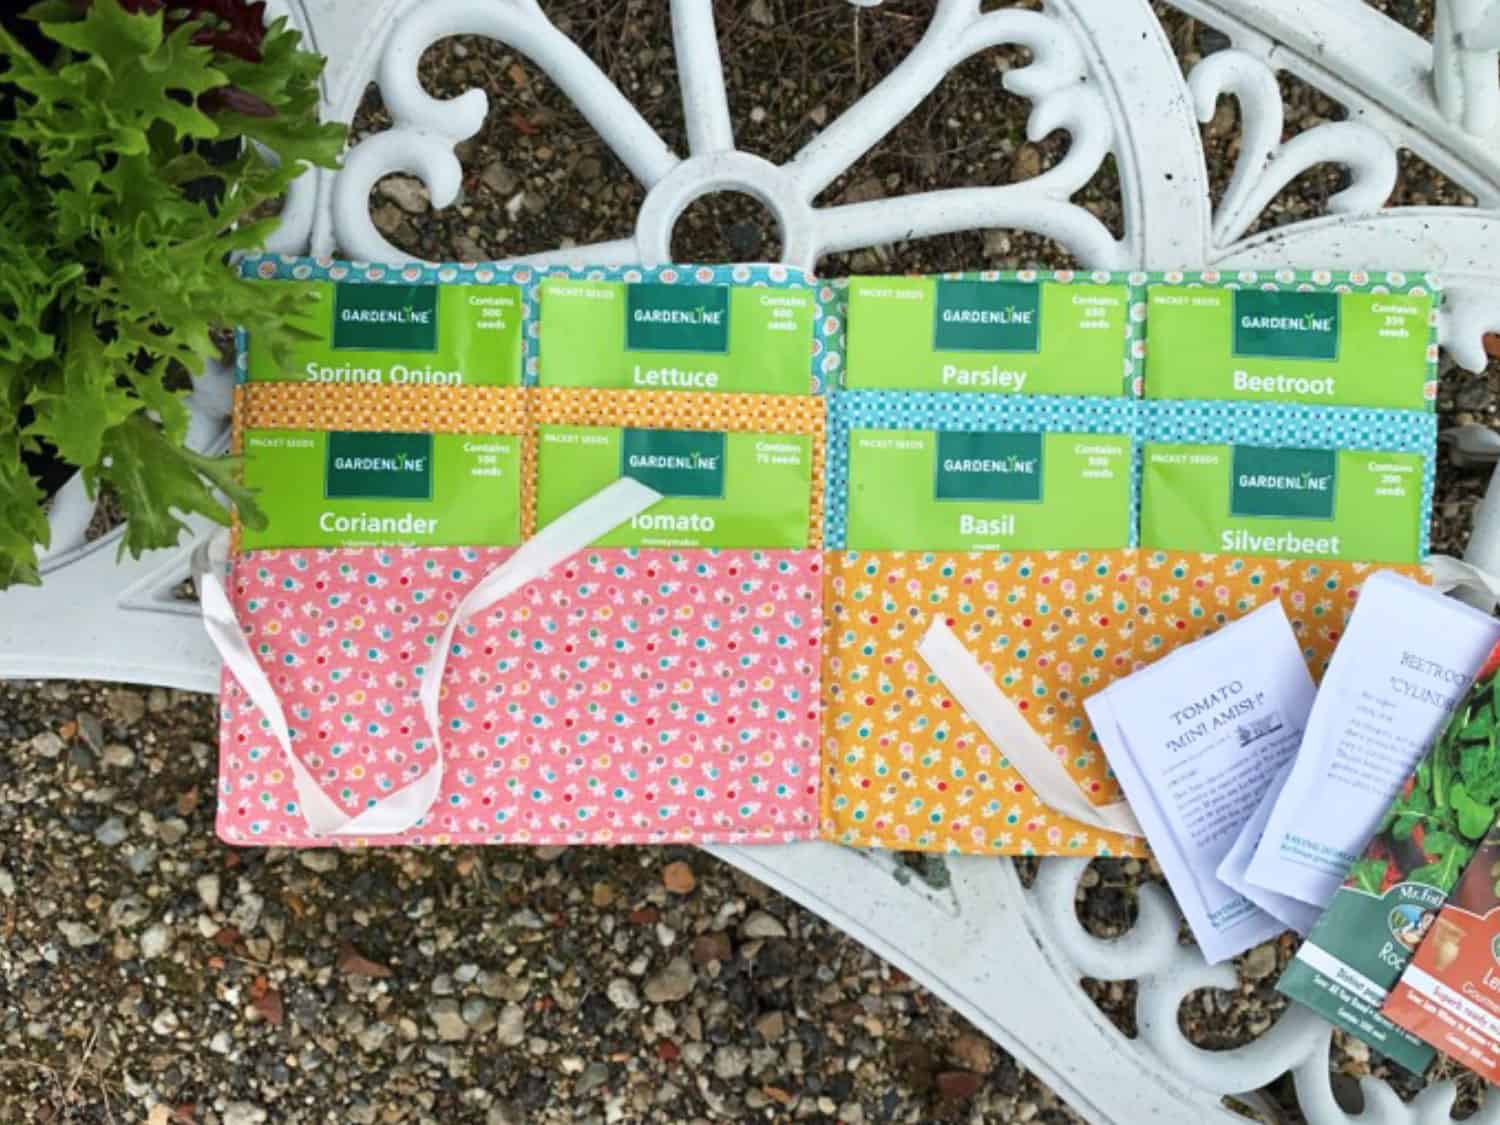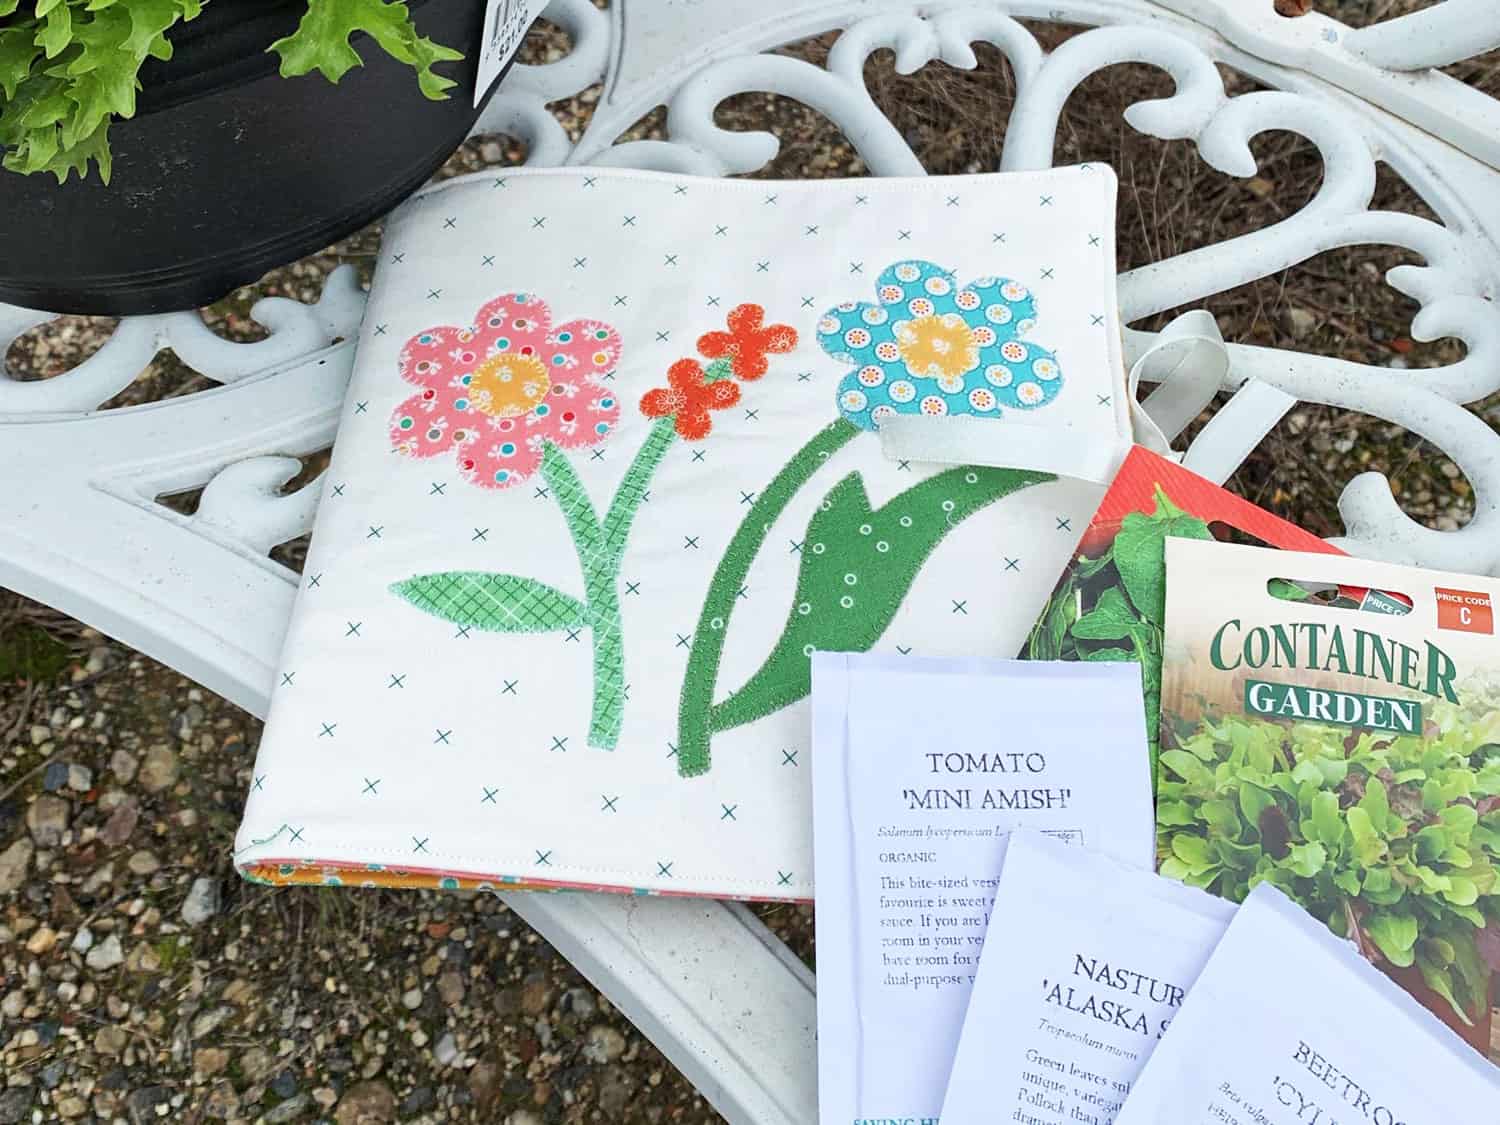
It’s warming up and time to start planning out our veggie gardens, and this handy Appliqued Seed Keeper is the perfect way to keep your seeds organized!
Using the sweet applique shapes from the GO! Qube Specialty Set by Edyta Sitar, this pretty project is great for your own seeds, or to make as gifts for the avid gardeners in your life!
Let’s Make a Seed Keeper!
Materials:
- AccuQuilt GO! Big, GO!, GO! Baby or GO! Me Fabric Cutter
- AQ55783 GO! Qube Specialty Set by Edyta Sitar using these dies from the set:
- AQ55744 GO! Flower Shapes by Edyta Sitar
- AQ55745 GO! Flower Accents by Edyta Sitar
- AQ55058 GO! Square – 8 ½” (8” finished)
- GO! Cutting Mat – AQ55137 (6” x 6”)
- GO! Cutting Mat – AQ55111 (10” x 10”)
- Assorted scraps or 6 – 8 fat quarters
- Fusible Webbing
- Scrap of batting at least 17 ½” x 9 ½”
- Two 12” pieces of ribbon
- Sewing Machine
- Matching Sewing Thread
- General Sewing Tools
Cutting Instructions:
- From assorted scraps or fat quarters:
- Using AQ55744 and AQ55745
- Iron fusible webbing to the back of your fabric. Cut your applique shapes of choice, guided by the photos of the front of the seed keeper
- Using AQ55058 GO! Square – 8 ½”
- Cut (8) squares of fabric
- Using AQ55744 and AQ55745
Sewing Instructions:
All seams are ¼” unless otherwise specified.Make the Cover
- Take one 8 ½” square of fabric to use as your front piece of the seed keeper. Choose one that is not too busy.
- Arrange the applique pieces as desired. I like to put rulers around the edges of my block as a guide to help me get the applique somewhat centred!
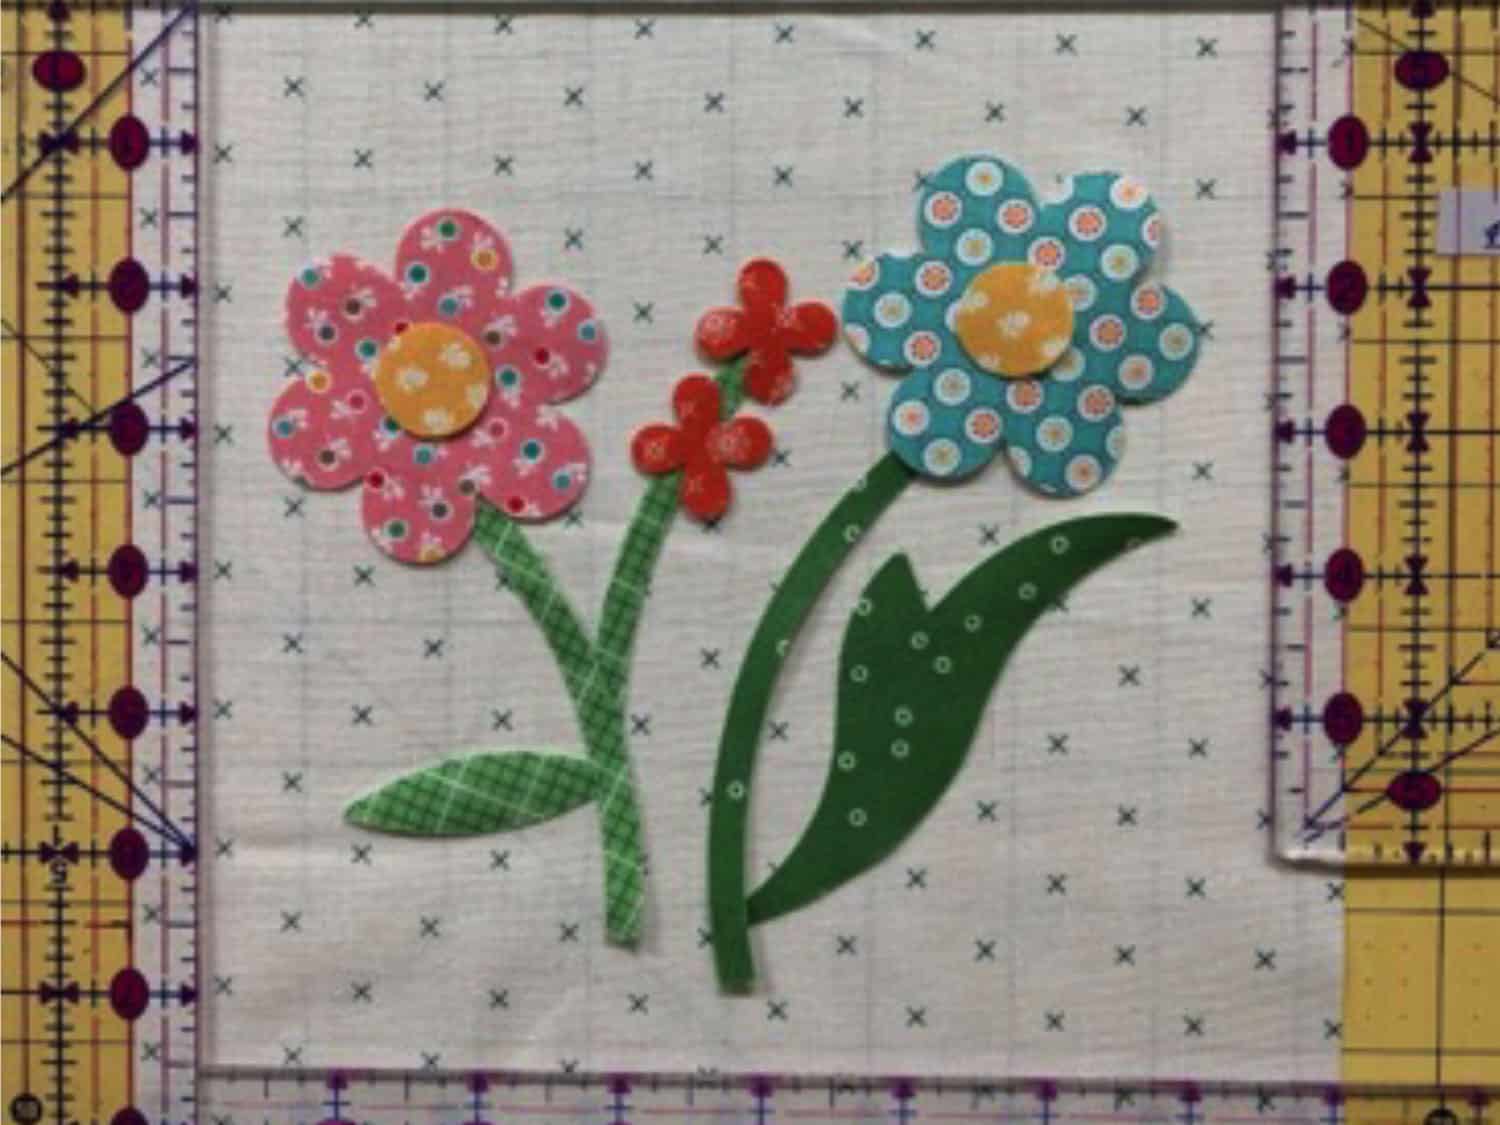
- Press down the applique pieces.
- Take one more 8 ½” square and place it right sides together with the applique block. Sew it to the left side of the block.
- Press the seam open.
- Place the completed front and back pieces on a scrap of batting and pin:
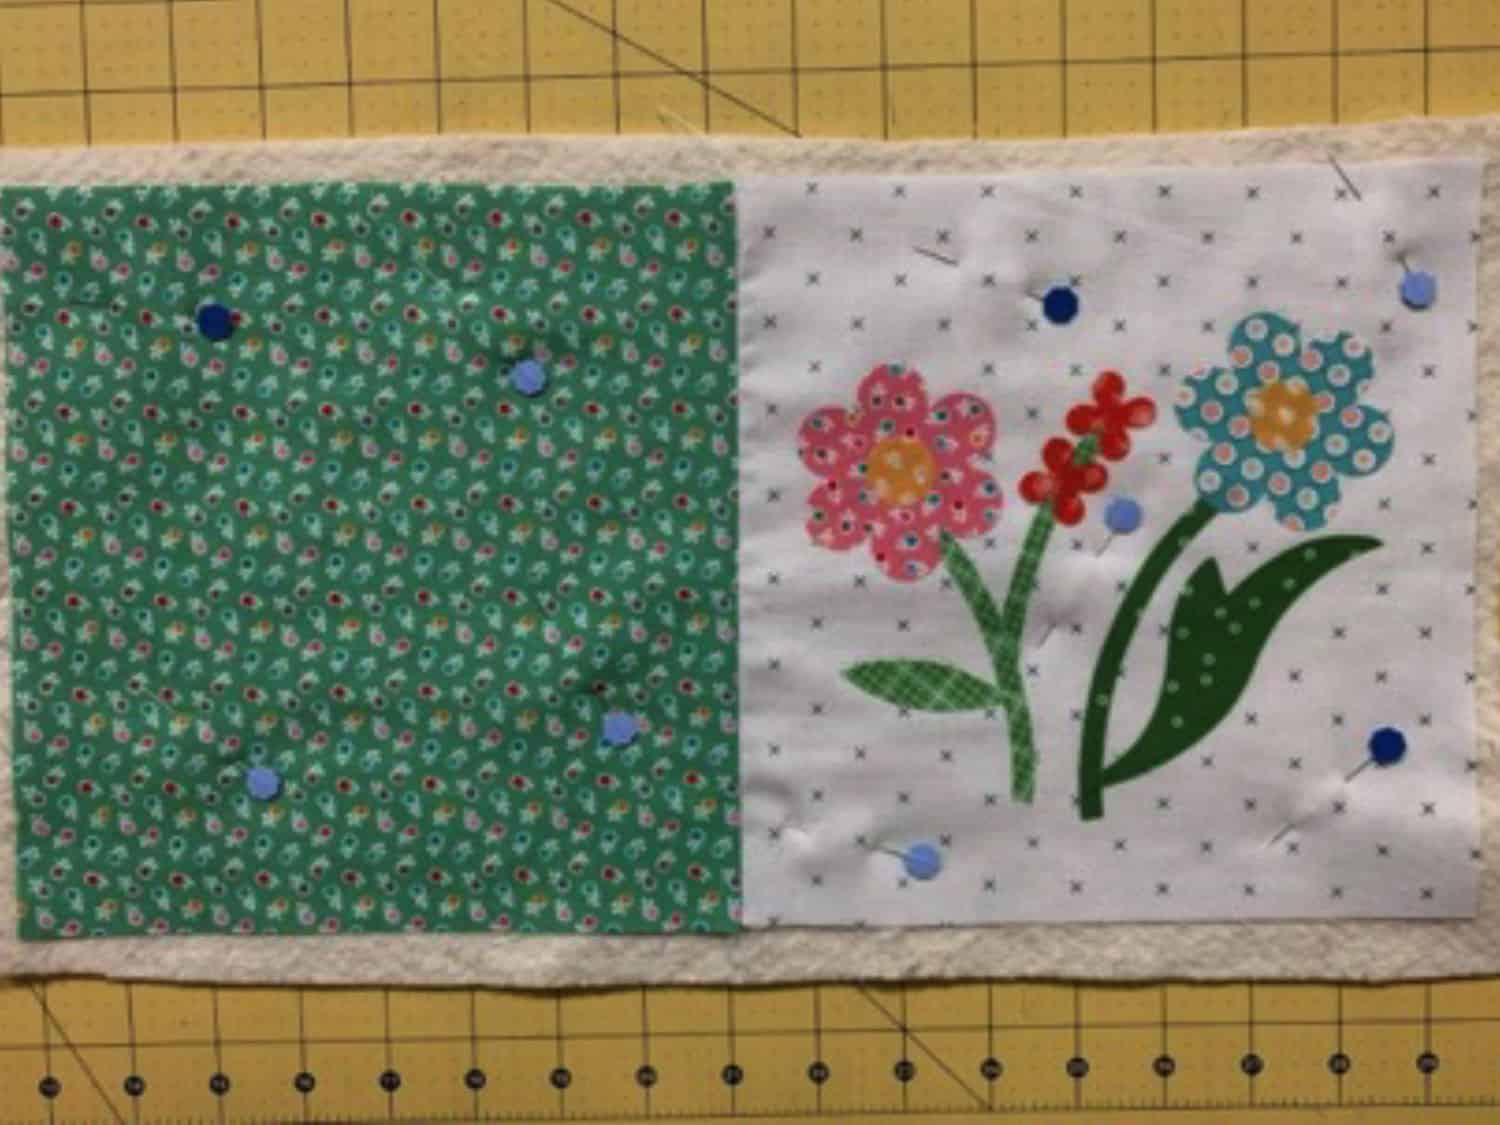
- Machine applique as desired. The batting helps stabilize the applique.
- Trim to 16 ½” x 8 ½”
Add the Ribbons:
- Place the ribbons approximately halfway on both sides of the seed keeper, right sides down, and with the length of the ribbons towards the inside of the blocks:
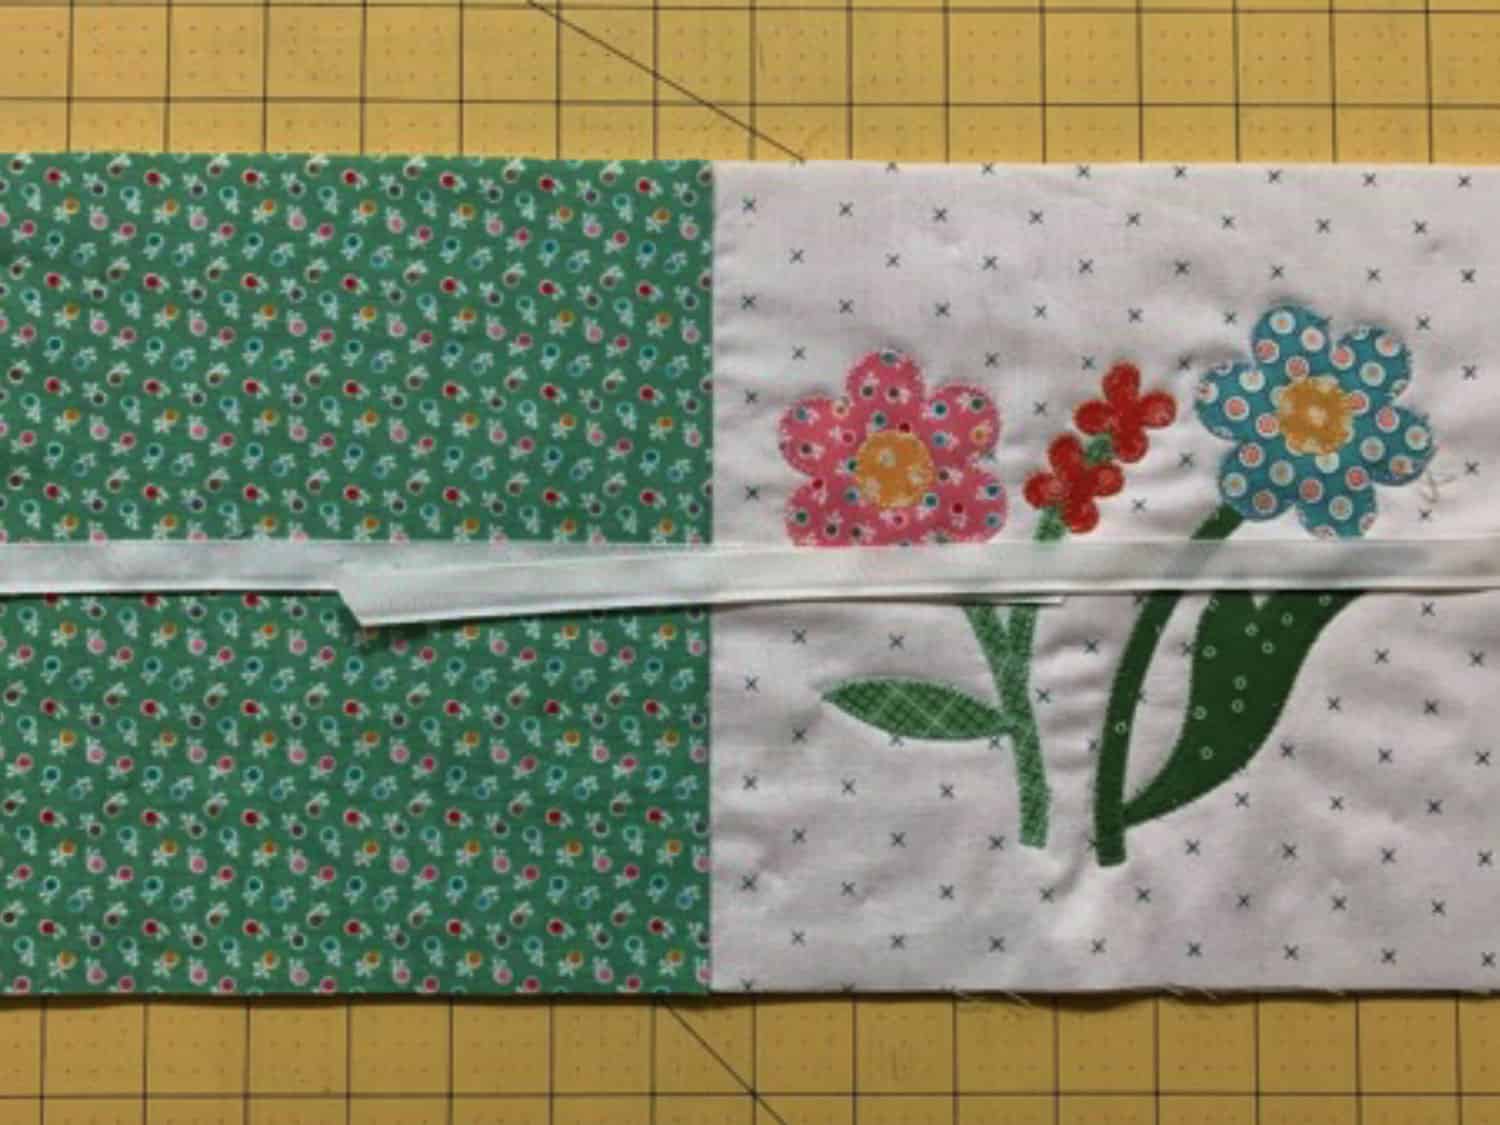
- Using an 1/8” seam allowance, stitch them down. This is just to hold them in place.
Make the Inside of the Seed Keeper
- Take two 8 ½” squares and fold them in half. Press.
- Take another 8 ½” square (this will be the background square). Place one of the folded squares on top of it, measuring 2” from the bottom:

- Sew down with a ¼” seam allowance.
- Take the other folded square and line it up with the bottom of the background square:
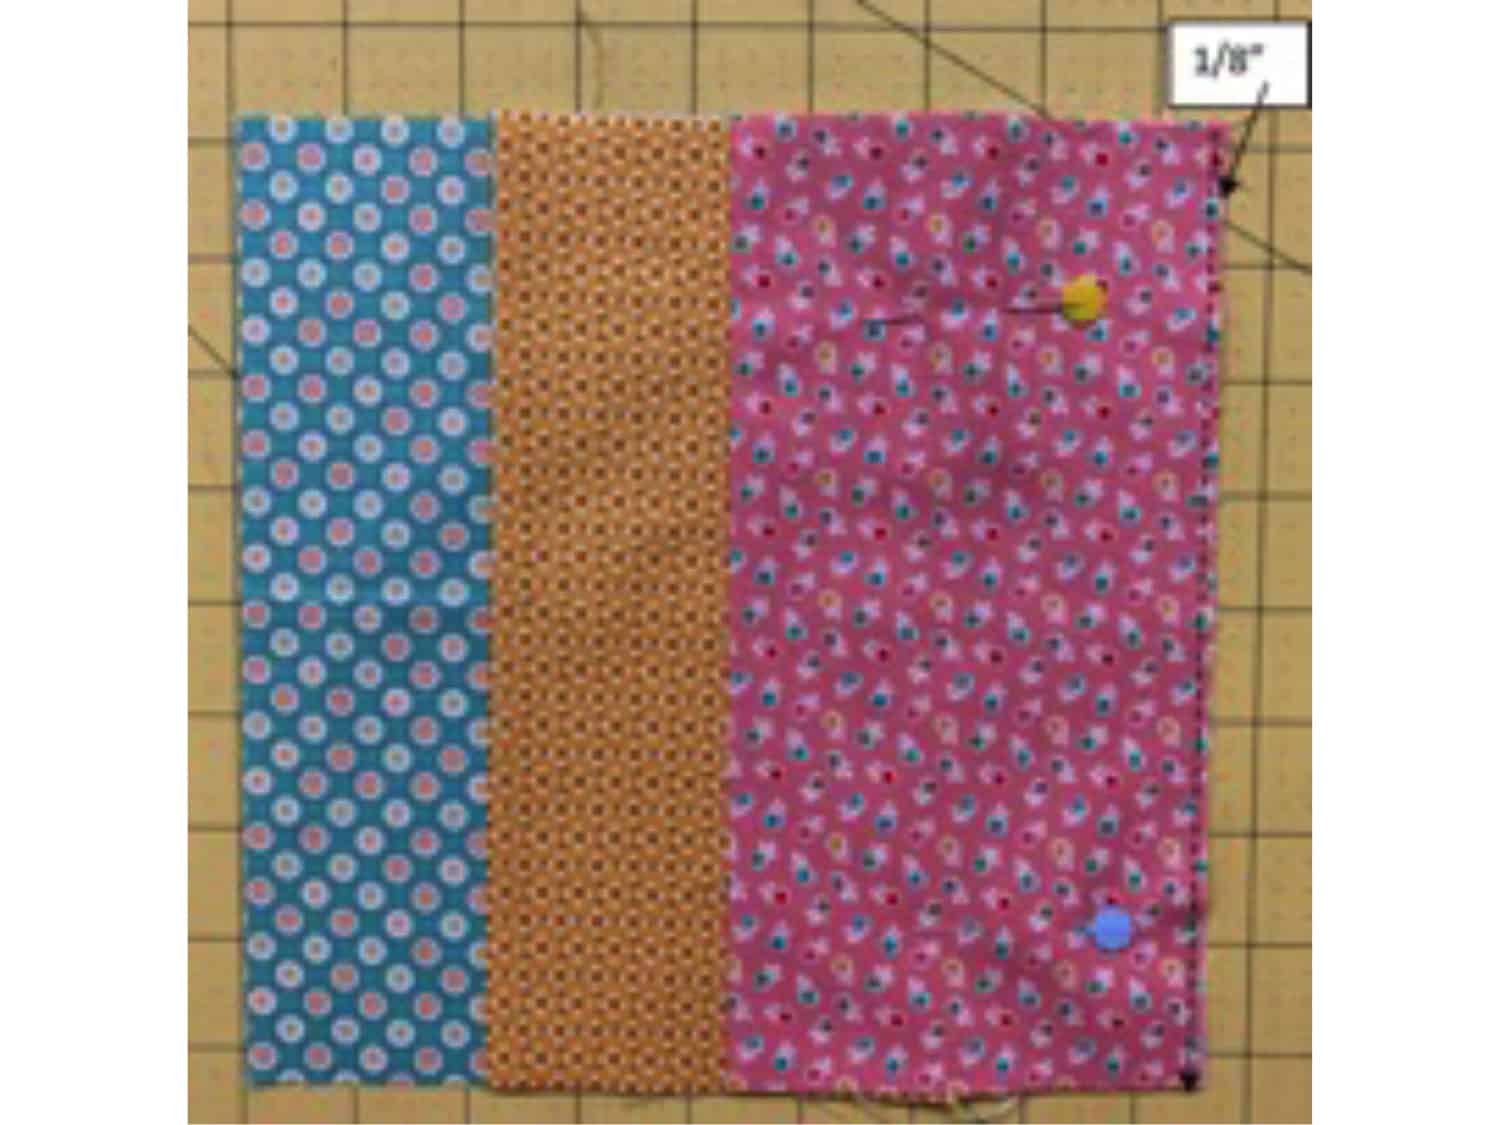
- Sew down with a 1/8” seam allowance. This is just to hold it in place.
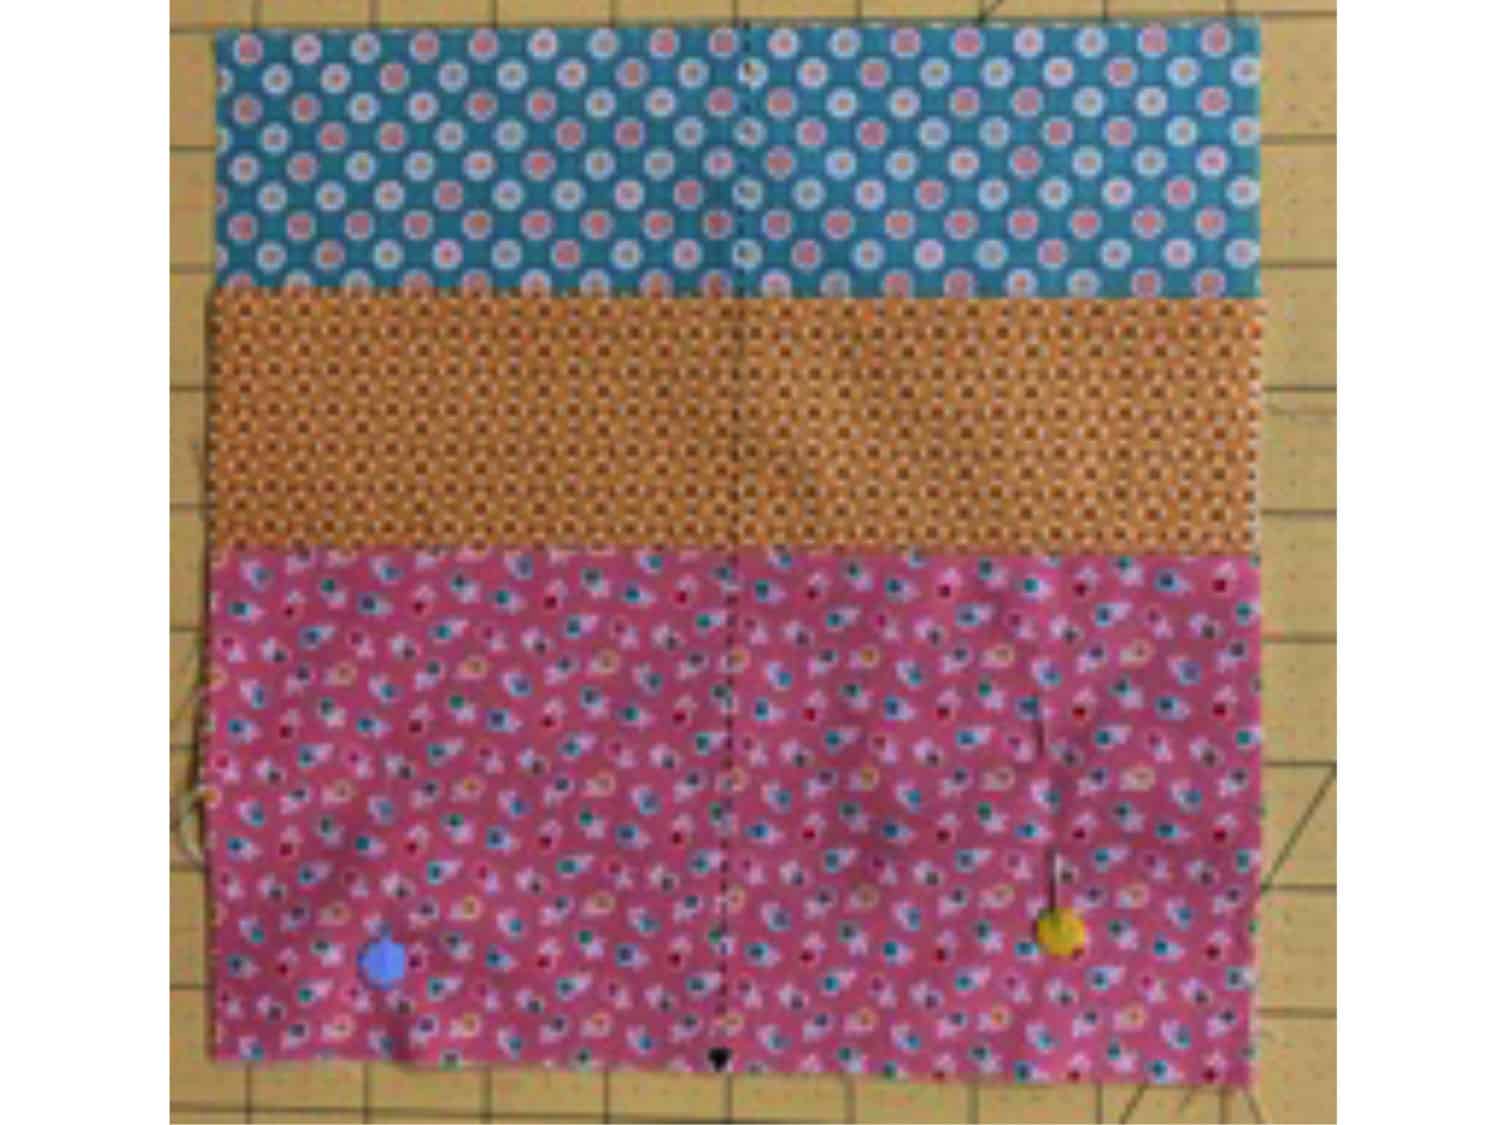
- Measure and draw a line from the top of the unit to the bottom, and sew along this line to form the pockets:
- Repeat steps 1-6 to make two of these inside units.
- Place the two completed pocket units right sides together and sew them together along one of the sides.
- Press open.
Putting it all together:
- Place the outside and inside units right sides together and pin. Make sure the ribbons are in the middle and away from any edges.
- Sew ¼” around the seed keeper, leaving a 2” – 3” opening at the top to turn.
- Trim the corners and turn right side out.
- Gently push the edges and corners out from the inside till it is nice and flat. Press, folding in the edges of the opening.
- Topstitch around the seed keeper, closing the opening as you stitch.
- Press in half.
- Pop in seed packets and tie the ribbon in a bow!
Congratulations on finishing your project!