This cute project takes no time to make! If you have a cat you can put it to use straight away, or make it as a gift for a friend!
Materials
- AccuQuilt GO! Big or GO! Fabric Cutter
- AQ55226 Go! Crazy Quilt – 6” Finished
- AQ55065 GO! Calico Cat
- AQ55000 GO! Square – 6 12/” (6” Finished)
- AQ55017 GO! Strip Cutter – 2 ½” (2” Finished) 3 Strips
- One Fat Quarter for the backing
- 1/8 Meter Fabric for the binding
- Scrap of Batting
- Scraps of Fabric
- Iron on fusible web
- Sewing Machine
- Matching Sewing Thread
- General Sewing Tools
Cutting Instructions
- From the fat quarter:
- With scissors or rotary cutter
- Roughly cut a rectangle 17” x 10”
- With scissors or rotary cutter
- From the scrap of batting:
- With scissors or rotary cutter
- Roughly cut a rectangle 15” x 8”
- With scissors or rotary cutter
- From the 1/8 meter of binding fabric
- Using AQ55017 Go! Strip Cutter – 2 ½” (2” Finished) 3 Strips
- Cut (1) 2 ½” strip
- Using AQ55017 Go! Strip Cutter – 2 ½” (2” Finished) 3 Strips
- From the fabric scraps
- Using AQ55226 Go! Crazy Quilt – 6” Finished
- Cut (1) each of shapes A to J
- Using AQ55226 Go! Crazy Quilt – 6” Finished
- From one fabric scrap
- Using AQ55000 GO! Square – 6 12/” (6” Finished)
- Cut (1) 6 ½” square
- Using AQ55000 GO! Square – 6 12/” (6” Finished)
- From one fabric scrap – iron on the fusible web and then
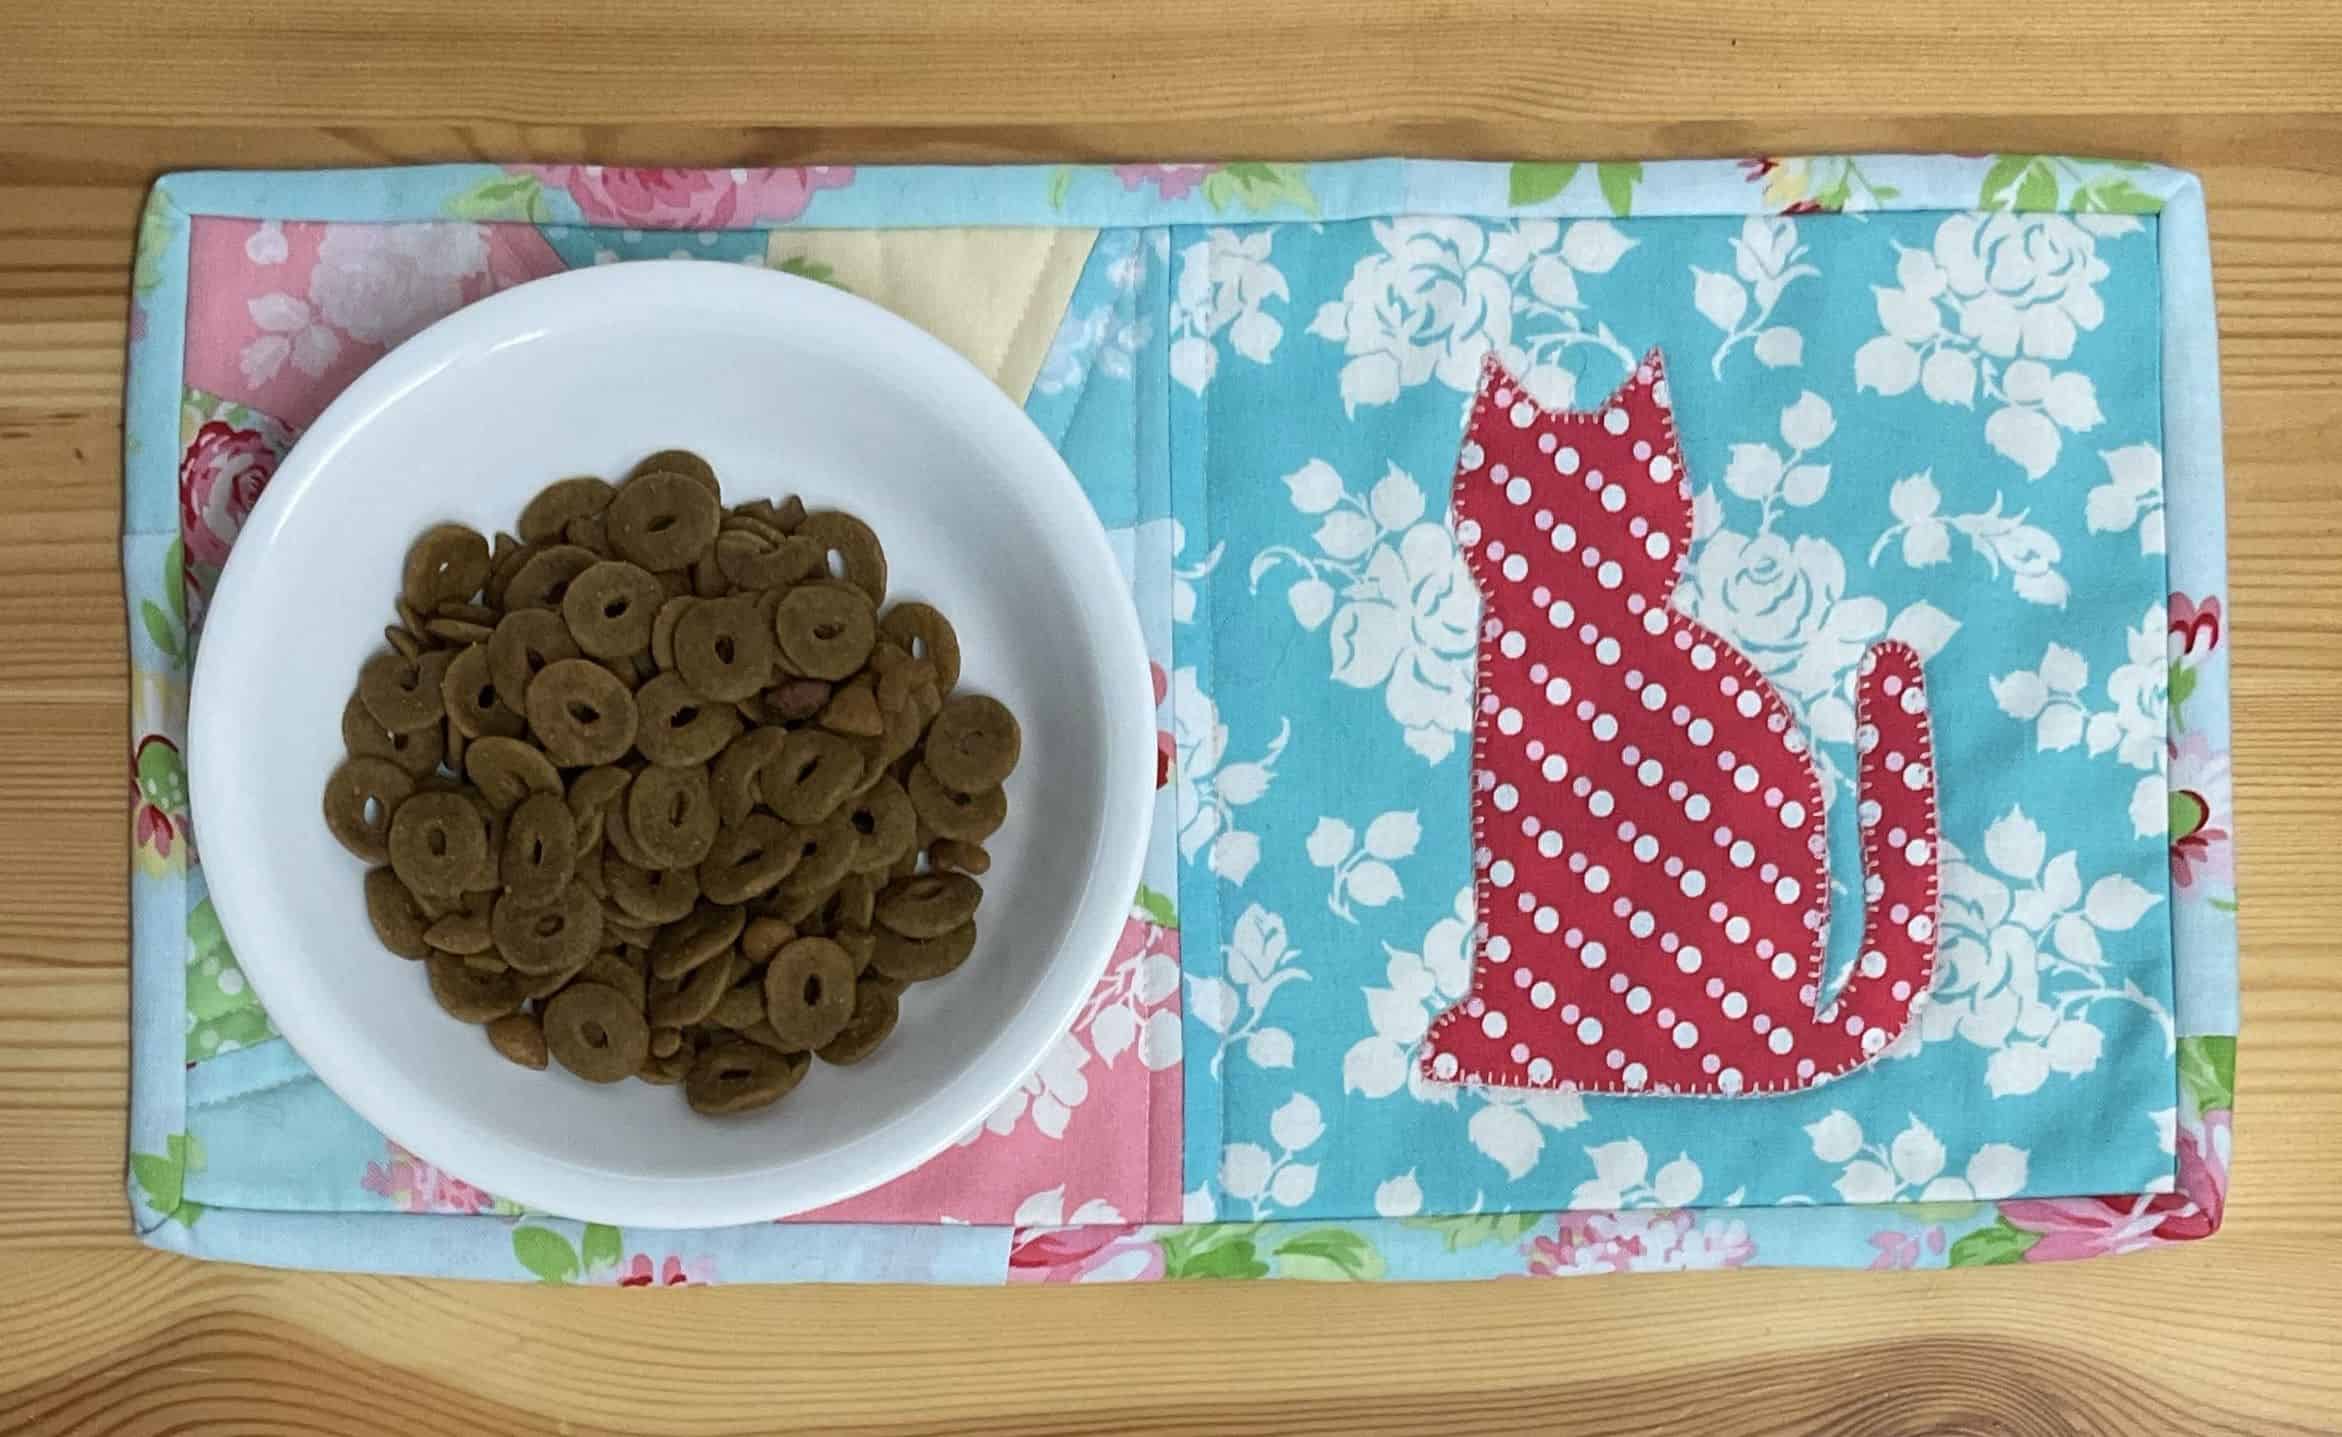
- Using AQ55065 GO! Calico Cat and with fabric facing down
- Cut (1) Calico Cat
- Using AQ55065 GO! Calico Cat and with fabric facing down
Sewing Instructions
All seams are ¼” unless otherwise specified.
Sew the Crazy Quilt Block
- Following the block assembly instructions found HERE for the Crazy Quilt Block, sew shapes A till J together to make the block:


Optional: Use your machine’s specialty stitches to embellish the crazy quilt block.
- Position the Calico Cat applique on the 6 ½” square.

Press and applique as desired.
- Sew the crazy quilt block to the left of the Calico Cat block.
- Layer the pieced blocks onto the batting and backing to make a quilt sandwich:

Quilt as desired.
- Trim the food mat:

- Bind using your preferred method.

Congratulations on finishing your project!