



Sign up for a free account now.
Cutter Compatibility
This die is compatible with these cutters:
Description
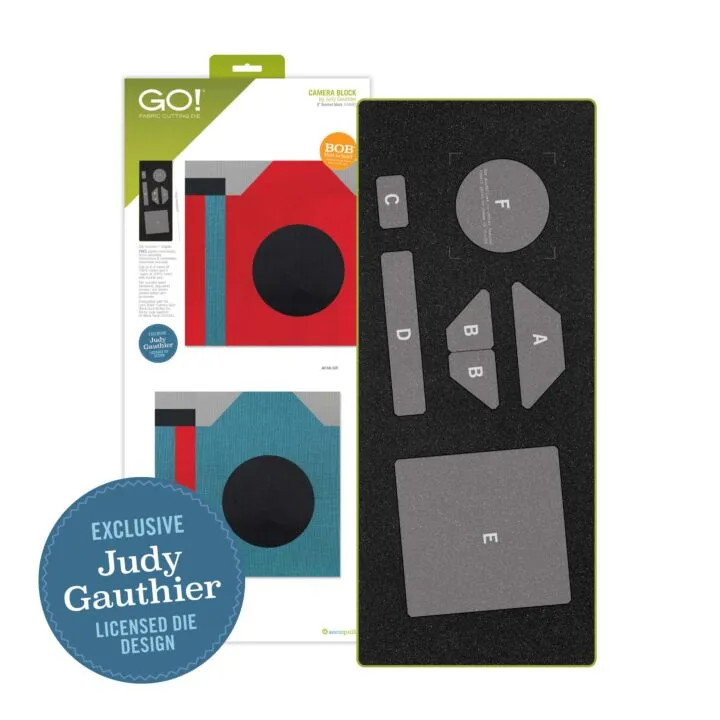
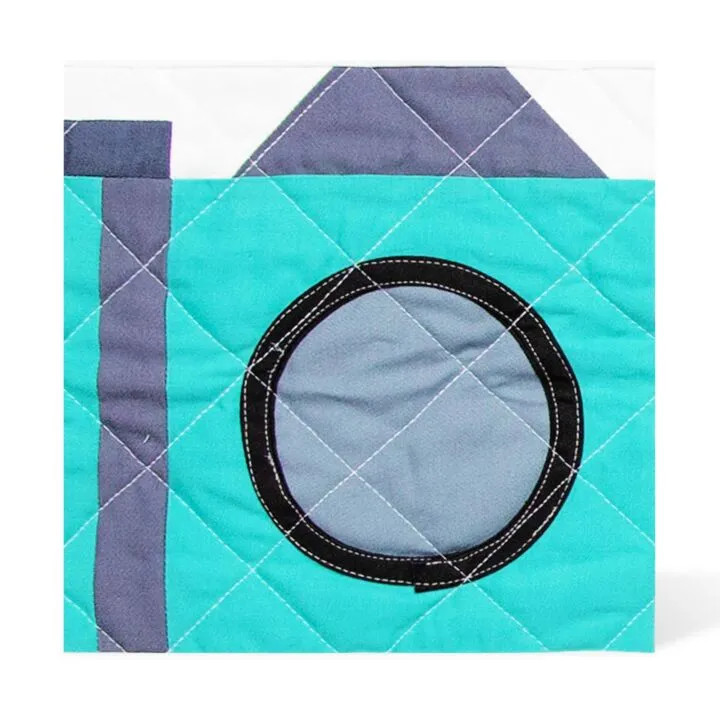
This Block on Board (BOB) die is a fun, modern way to create oh-“sew” many projects! From pillows to wall hangings and more, this die offers a whimsical way to capture memories of holidays and special occasions. Specialised screen printing on the die makes it easy to centre images and designs within the camera lens — get the picture?
This Block on Board (BOB) die is a fun, modern way to create oh-"sew" many proje
For the best cutting results, position fabric along the lengthwise grain (straight of grain) as it goes under the roller.
Tip: This die is specially designed to cut one complete 4-colour 8″ finished block in a single pass through the cutter.
Fabric Colour 1:
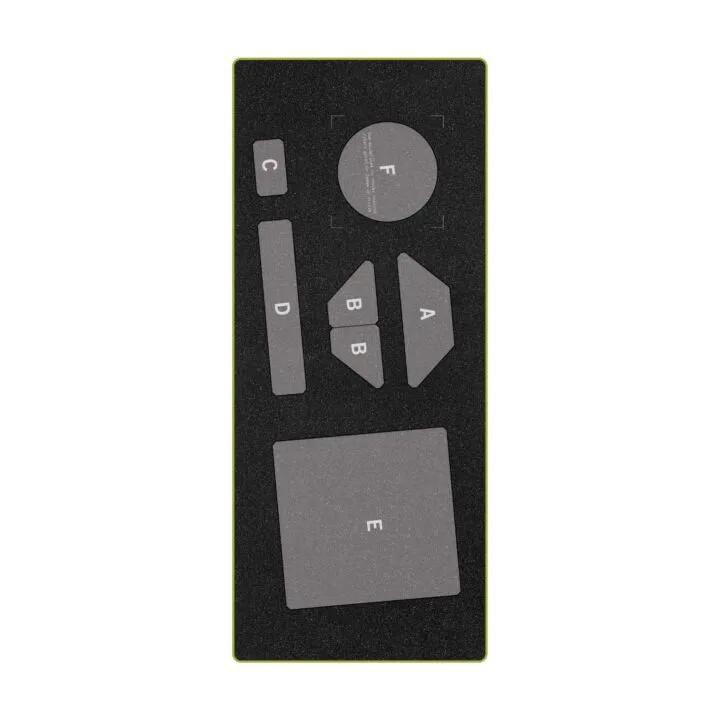
Cut one 6″ x 2½” rectangle. Place right side up over shape A to cut one shape.
Cut one 7½” x 1⅞” rectangle. Place right side up over shape D to cut one shape.
Cut one 7¼” x 7½” rectangle. Place right side up over shape E to cut one shape.
Fabric Colour 2:
Cut one 5⅝” x 2½” rectangle. Place right side up over shapes B to cut two shapes.
Cut one 2¾” x 1¾” rectangle. Place right side up over shape C to cut one shape.
Fabric Colour 3:
Cut one 2¾” x 1¾” rectangle. Place right side up over shape C to cut one shape.
Cut one 4½” pre-fused fabric square. Place right side up over shape F to cut one shape. Use guidelines to centre the desired fabric or image on the circle.
Fabric Colour 4:
Cut one 7½” x 1⅞” rectangle. Place right side up over shape D to cut one shape.
The Camera Block by Judith Gauthier is a fun and creative design – ideal for quilters and photography lovers alike. This block lets you stitch together memories, one fabric snapshot at a time!
The Camera Block is a Block on Board® (BOB®) die, meaning it’s specially designed to cut a 4-colour, 8″ finished block in just one pass through your cutter.
Includes 7 shapes that are often time-consuming to cut by hand.
Features specialised dog-ears and ¼” seam allowances for accurate and easy piecing.
Includes screen-printed letters and guidelines directly on the die for easier shape identification and assembly.
Free pattern downloads and step-by-step instructions are available to help you get started.
Cut more fabric in less time
Get precise cuts every time – no slipping rulers or cutting errors
Incredibly easy to use – simply place the die on the cutter, then layer your fabric and mat on top
Save fabric with Two-Tone Foam – place fabric only where needed to reduce waste
Safe to use – no blades near your fingers
With some fabrics, you may notice a thread or two remains where the die blades meet. Just snip with scissors.
Blades on some dies are angled – align fabric to the edge of the shape, not the die board.
Use high-quality fabric to help minimise stretching.
Always test cut one shape before cutting multiples to ensure fabric orientation is correct.
| Weight | 1.7 kg |
|---|---|
| Dimensions | 67 × 27 × 2 cm |
* To conserve fabric, cover the only shape you want to cut - not the entire board. For asymmetrical shapes, place fabric pattern side up if you want the shape to look exactly like the shape on the die. Place fabric side down if you want the shape to be a mirror image of the shape on the die.
Care and Maintenance:
Use adhesive roller to clean lint and thread from dies. After each use, with the die pick provided with the cutter, remove any threads imbedded between blades and foam. It’s normal for threads to get caught where blades meet in a die. Remove with tweezers or die pick. Die blades never need to be sharpened.
Warranty:
AccuQuilt GO! dies and Studio dies are guaranteed for one year.