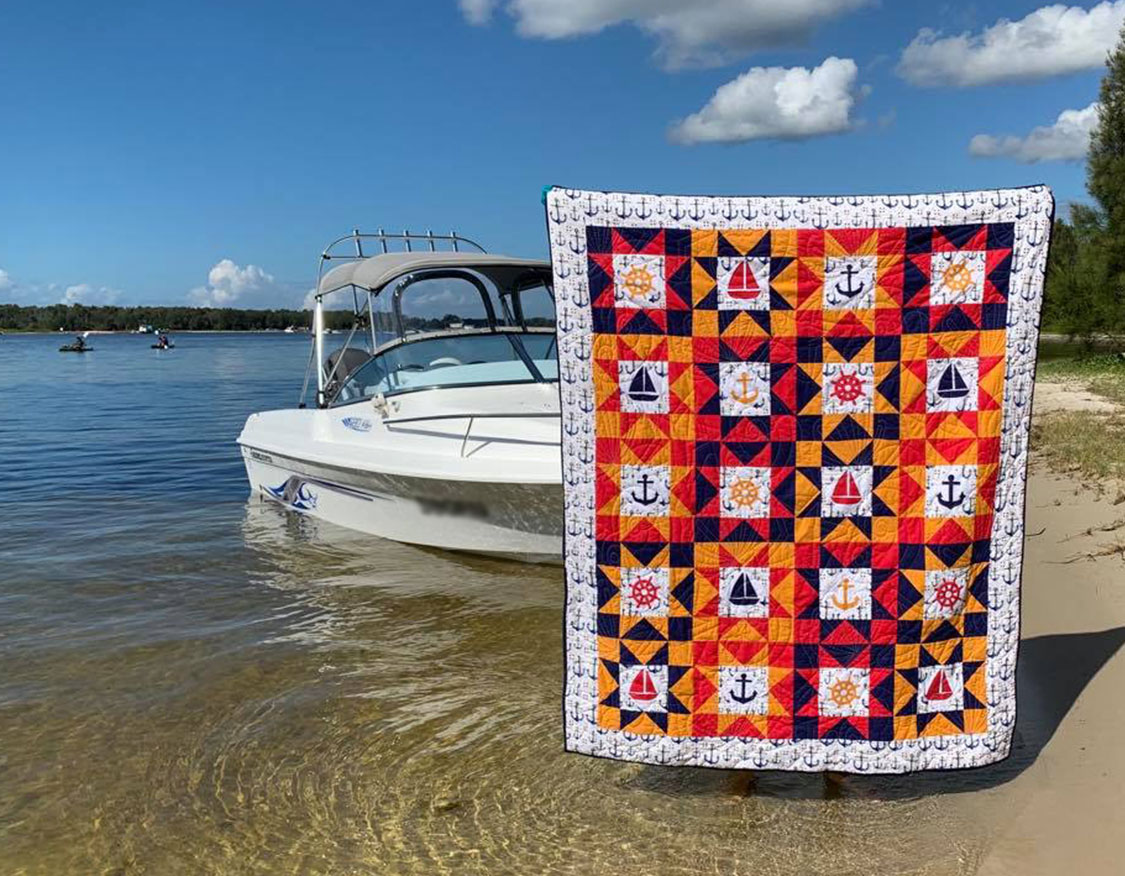
The stars guide the way to find your way home with this nautical theme quilt. This Sweet Sailing quilt features the GO! Nautical Medley and is perfect for any coastal décor home or the sea-farer in your life.
Materials:
- AccuQuilt GO! Big or GO! Fabric Cutter
- AQ55778 GO! Qube Mix & Match Set 12” Block
- AQ55497 GO! Nautical Medley
- AQ55023 GO! Strip Cutter- 5” (4 ½” Finished)
- AQ55017 GO! Strip Cutter- 2 ½” (2” Finished)
- AQ55113 GO! Cutting Mat 10” x 24”
- AQ55112 GO! Cutting Mat 6” x 12”
- 50cm white fabric
- 2.5m of print fabric (I used a directional print and needed more fabric to compensate the side borders)
- 1.3m red fabric
- 1.4m yellow fabric
- 2.1m blue fabric
- 40cm of fusible web for appliques
- 40cm tearaway
- 1.8m backing fabric
- 1.8m wadding
- Embroidery threads to match the fabric
- Bobbinfil
- Rotary cutter, mat and ruler
- Sewing machine and general sewing tools
Cutting Instructions:
*All instructions will now be in Imperial measurements as per standard patchwork and quilting measurements.- From white fabric:
- Cut (3) 5 ¼” strips:
- Using Shape 6, cut (20) square on points.
- Cut (3) 5 ¼” strips:
- From print fabric:
- Cut (4) 4 ¾” strips:
- Using shape 5, cut (80) Half Square Triangles (HST)
- Cut (1) 11” strips by the length of the fabric:
- Using AQ55023, cut (2) 5” strips for side borders.
- Cut (2) 11” strips across remain the width of the fabric:
- Using AQ55023, Cut (4) 5” strips for top and bottom borders.
- Cut (4) 4 ¾” strips:
- From red fabric:
- Cut (3) 4” strips:
- Using shape 2, cut (24) squares.
- Cut (2) 7 ½” strips:
- Using shape 4, cut (24) Quarter Square Triangles (QST)
- Cut (3) 4 ¾” strips:
- Using shape 5, cut (56) HST.
- Cut (1) 4 ½” strip. Apply fusible web onto the back of this strip.
- Using AQ55497, cut a variety of 7 shapes.
- Cut (3) 4” strips:
- From yellow fabric:
- Cut (3) 4” strips:
- Using shape 2, cut (28) squares.
- Cut (2) 7 ½” strips:
- Using shape 4, cut (28) QST
- Cut (4) 4 ¾” strips:
- Using shape 5, cut (56) HST.
- Cut (1) 4 ½” strip. Apply fusible web onto the back of this strip.
- Using AQ55497, cut a variety of 6 shapes.
- Cut (3) 4” strips:
- From blue fabric
- Cut (3) 4” strips:
- Using shape 2, cut (28) squares.
- Cut (2) 7 ½” strips:
- Using shape 4, cut (28) QST
- Cut (4) 4 ¾” strips:
- Using shape 5, cut (56) HST.
- Cut (1) 4 ½” strip. Apply fusible web onto the back of this strip.
- Using AQ55497, cut a variety of 6 shapes.
- Cut (1) 16” strip:
- Using AQ55017, cut 6 strips for binding
- Cut (3) 4” strips:
Sewing Instructions:
All seams are ¼” unless otherwise stated.- Pin and sew one print shape 5 HST to each side of one white shape 6 Square on Point to create unit shown right. Press seams towards print fabric.

- Pin and sew one blue fabric, shape 4 QST to two red shape 5 HST together to form a flying geese unit as shown right. Make four flying geese units.

- Pin and sew one flying geese unit to each side of the square in a square unit as shown. Press seams open.

- Pin and sew one blue square to each side of the flying geese unit as shown right. Make two combined units.

- Pin and sew one combined unit to top and bottom of block centre to complete block. Press seams open.

- Repeat steps 1 – 5 to make the following colour combinations:
- 3 blue with yellow star
- 4 yellow with blue star
- 3 yellow with red star
- 4 red with yellow star
- 2 red with blue star.
You should now have 20 blocks in total.
Applique HINT:You may like to place all blocks on a design board and sort all applique shapes prior to starting to avoid ‘doubling up’ when appliqueing.- Using your GO! Nautical Medley shapes remove the backing paper from one shape and place in the centre of each star. Iron in place as per manufacturer instructions.
- Pin a square of tearaway to the wrong side of the block.
- Using embroidery thread in the top thread and bobbin fil in the bobbin, applique around each shape.
- Repeat for all 20 blocks.
Design Feature: Use an assortment of satin, blanket, motif or decorative stitch for appliqueing on each applique to add interest and texture. Contrasting and matching threads will also add variety.
Embroidery- Download the free GO! Nautical Medley Embroidery Designs here.
- As per your machine instructions, use the embroidery designs to embroidery each design.
- Repeat for all 20 blocks.
Quilt Assembly
- On a design board, or floor, layout blocks in desired pattern so there are 4 blocks across and 5 blocks down.
- Sew blocks together in rows. Pressing seams in different directions for each row.
- Sew rows together, matching seams. With the seams pressed in different directions, the seams should nest. Press.
- Sew the short ends of (2) 5” strips of width of fabric together for top and bottom border. Press seam open. Repeat to make 2 strips. Crosscut (2) strips at 48 ½”.
Hint: When cutting sashes or borders, always cut so the centre seam is in the middle of the strip. This way you will have an ‘even’ looking quilt.
- Using (1) strip, match centre of border with centre of top of quilt, pin and sew. Press to outside of quilt.
- Repeat for bottom border of quilt.
- Crosscut (2) side border to 60 ½”.
- Using (1) strip, match centre of border with centre of side of quilt, pin and sew. Press to outside of quilt.
- Repeat for other side of border.
Quilting and Finishing
- Layer wadding between quilt top and backing.
- Pin or baste layers together.
- Machine quilt with an all-over design.
- Add binding, mitring corners.
Thanks for the pattern will enjoy making the quilt for my son-law.