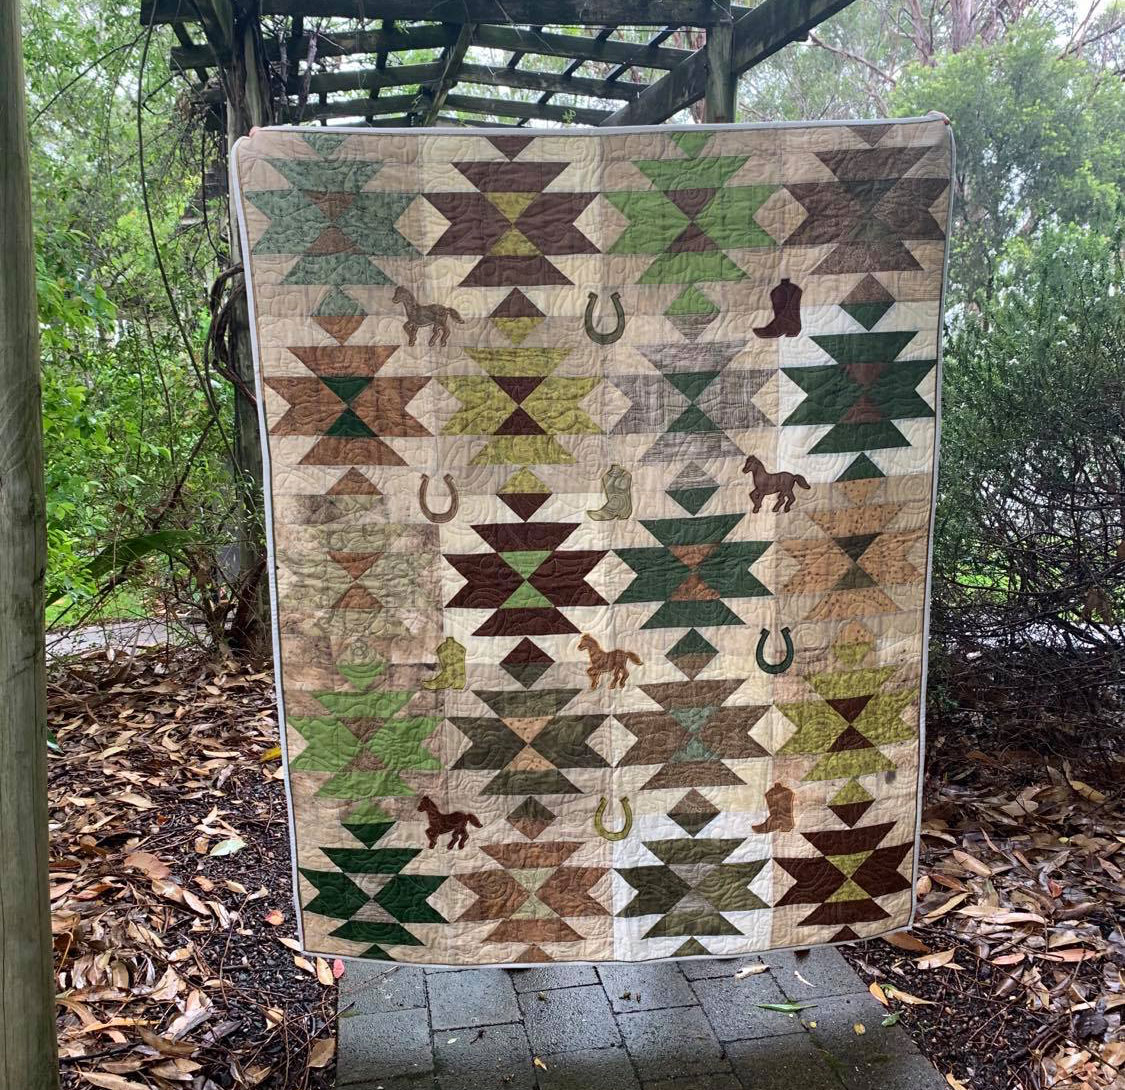
They say you can take the girl out of the country, but now she can take the country with her wherever she goes!
This quilt is a fantastic project for any horse-loving, boot-wearing or country loving guy or gal. With the sandy creams, tree coloured browns and leafy green hues this is the perfect gender-neutral quilt.
Materials:
- AccuQuilt GO! Big, GO!, GO! Me or GO! Baby Fabric Cutter.
- AQ55777 GO! Mix & Match Qube – 9” Finished Block.
- AQ55786 or AQ55781 Qube 9” Set Companion – Classic or Corners.
- AQ55017 GO! Strip Cutter 2 ½” – (2” Finished).
- AQ55112 GO! Cutting Mat 6” x 12”.
- 50cm (5) assorted medium and dark greens.
- 50cm (5) assorted medium and dark browns.
- 30cm (10) assorted light beige fabrics for main.
- 40cm of binding fabric.
- 1.6m x 1.6m of wadding.
- 1.6m x 1.6m of backing.
- 40cm of paper-backed fusible web.
- (12) 20cm x 20cm pieces of tearaway (larger if you are going to embroider.
- Embroidery thread to match medium and dark greens and browns.
- Bobbin fil.
- Sewing machine and all accessories.
Cutting Instructions:
*All instructions will now be in Imperial measurements as per standard patchwork and quilting measurements.- Cut (3) 5 ½” strips of the 10 assorted greens and browns. Using you Qube sets from each strip cut:
- Shape 4 – cut (12) Quarter Square Triangle (QST).
- Shape 5 – cut (16) Half Square triangles (HST).
- Shape 8 – cut (8) Rectangles.
- Cut (2) 5 ½” strips of the 10 assorted beige strips. Using the Qube and Companion Sets, cut:
- Shape 4 – cut (4) QST.
- Shape 5 – Cut (8) HST.
- Shape 8 – cut (8) Rectangles.
- Shape 9 – cut (8) Chisels. *This is a directional die and the fabric needs to be fan-folded.
- Apply paper backed fusible web to the leftover strips of green and brown fabrics. Using AQ55227, cut out (4) of each horse, boot and horseshoe.
- From binding fabric,
- Cut (1) 16” strip:
- Using AQ55017, cut (6) 2 ½” strips.
- Cut (1) 16” strip:
Sewing Instructions:
All seams are ¼” unless otherwise stated.There are two main styles of blocks: 10 blocks being predominately brown and 10 blocks being predominately green.
Sort cut fabric into the following blocks
- 10 Predominately Brown blocks:
- (4) brown shape 4 QST
- (8) brown shape 5 HST
- (4) brown shape 8 rectangles
- (2) green shape 4 QST
- (2) beige shape 4 QST
- (4) beige shape 5 HST
- (4) beige shape 8 rectangles
- (4) beige shape 9 chisels

- 10 Predominately Green blocks:
- (4) green shape 4 QST
- (8) green shape 5 HST
- (4) green shape 8 rectangles
- (2) brown shape 4 QST
- (2) beige shape 4 QST
- (4) beige shape 5 HST
- (4) beige shape 8 rectangles
- (4) beige shape 9 chisels

Hint:Personally, with a multi pieced block like this, I prefer to sew one complete block at a time. With the block having so many seams, if chain piecing, I tend to make quite a few mistakes. The option is yours though.
Brown Blocks:
- Sew (2) beige HST to each side of (1) brown QST as shown in illustration 1. Repeat for second QST.

- Sew (2) brown HST to each side of (1) beige QST as shown in illustration 2. Repeat for second QST.

- Sew (1) brown HST to (1) chisel as shown in illustration 3. Repeat for directional opposite chisel. Make a second set of chisel units.

- Using (2) brown and (2) green QST, stitch together as shown in illustration 4. Make 2 units.

- Sew these two units together, as shown in illustration 5, to make the centre.

- Take the (1) cream flying geese unit and sew it to (1) brown rectangle, as shown in illustration 6. Repeat for second unit

- Arrange all the units in columns and rows, as illustrated below.

- Take the rectangle from row (R) 1, column (C)1, and sew to brown flying geese unit from R1, C2. Do not remove from machine or cut thread.
- Chain piece the next chisel from R2, C1 to the rectangle from R2, C2. Do not remove from machine or cut thread.
- Continue to sew down the rows the units from C1 and C2. Cut thread and remove from machine.
- Sew Column 3 onto the C1/2 units in correct order. Press seams in alternating ways.
Technique Tip: Once you have sewn column 1 to column 2, do not cut the thread in between each the rows. Once you have column 3 sewn to the C1/2 rows, the rows are in their correct order for sewing, joined with a small amount of thread. It makes sewing blocks quicker, decreasing the risk of sewing in the incorrect orientation. - Sew Row 1 and Row 2 together, nesting the seams for accurate piecing.
- Continue sewing all rows together until you have completed the block. Press all seams.
- Repeat steps 3 to 16 for all remaining blocks, both brown and green.
- On a design board or floor, arrange the blocks, 4 across and 5 down, in the colour order you prefer.
- Sew your first row together, pressing seams to one side.
- Continue to sew the rows together, pressing seams in alternate directions.
- Sew Row 1 onto Row 2, nesting as many seams as you can. Press.
- Continue sewing all 5 rows are sewn together and quilt top assembled.

- Using the horse, horseshoe and boot applique shapes, arrange them in the centre of the cream blocks as shown. Iron in place.
Applique Method:
- Pin a piece of tearaway to the wrong side of fabric under your applique.
- Using embroidery thread in the top thread and bobbinfil in the bobbin, applique around each shape, changing colours as you go.
- Repeat for all 13 designs.
Design Feature: Use an assortment of satin, blanket, motif or decorative stitch for appliqueing on each horse, horseshoe or boot to add interest and texture. Contrasting and matching threads will also add variety.
Embroidery:
- Download the free GO! Western Medley Embroidery Designs
- As per your machine instructions, use the embroidery designs to embroidery each design.
- Repeat for all 12 blocks.
Quilting and Finishing:
- Layer wadding between quilt top and backing.
- Pin or baste layers together.
- Machine quilt with an all-over design.
- Add binding, mitring corners.