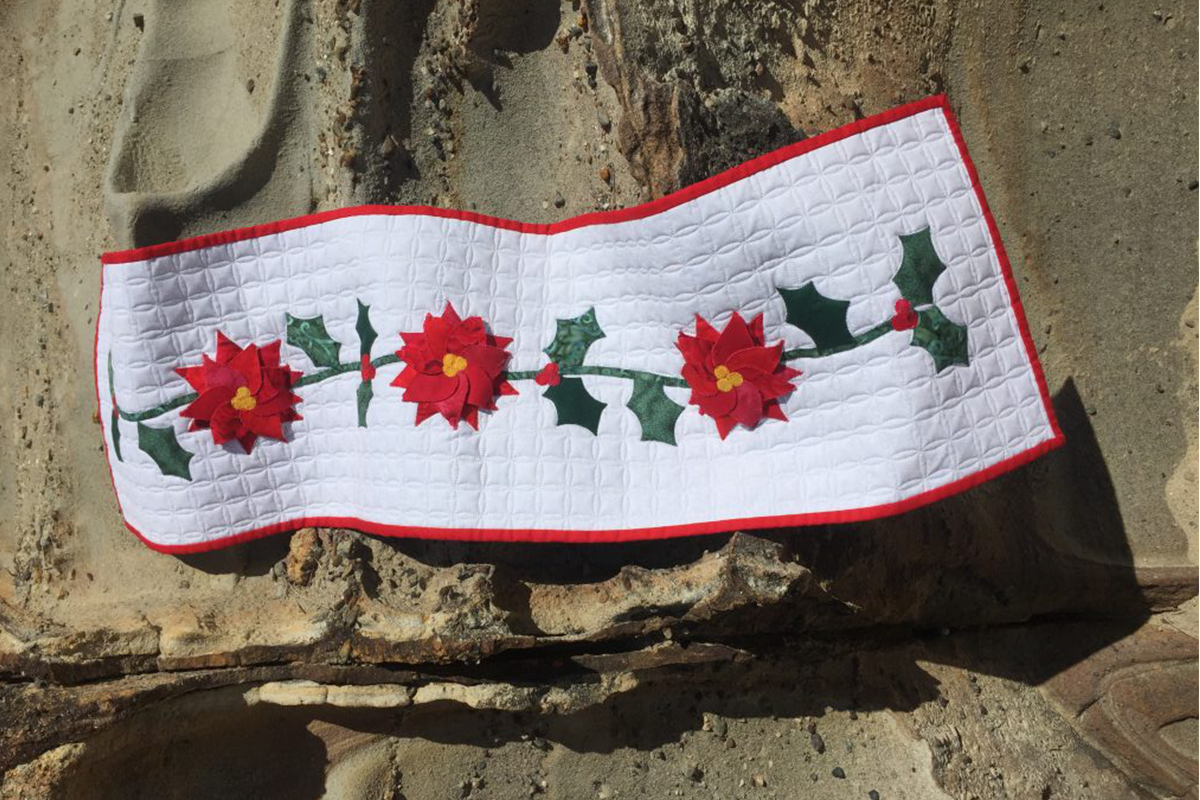
Brighten your table this Festive season with this quaint Poinsettia Table Runner. A perfect addition to any house.
Materials:
- AccuQuilt GO! Big, GO! or GO! Baby Fabric Cutter
- AQ55008 GO! Feathers
- AQ55043 GO! Holiday Medley
- AQ55331 GO! Stems & Leaves
- AQ55137 GO! Cutting Mat 6” x 6”
- AQ55112 GO! Cutting Mat 6” x 12”
- 40cm x 115cm of white cotton fabric for top (you can make longer if desired)
- 50cm x 150cm of cotton fabric for backing
- 20cm of red cotton fabric for binding
- 50cm x 150cm of wadding
- An assortment of red fabrics for Poinsettia and Holly Berries
- An assortment of green fabrics for Stems and Holly Leaves
- 10cm x 10 cm of yellow fabric for Poinsettia Centres.
- 30cm x 100cm of fusible web
- Red, green and yellow embroidery threads to match fabrics.
- 25cm x 100cm of tearaway
- Jeans sewing machine needle
- Soluble stabiliser (optional)
- General sewing tools
Cutting Instructions
- Red Fabric:
- Iron fusible webbing onto the back of the red fabrics. Cut 21 straight Feathers, AQ55008, in varying colours .
- Cut 12 circles for berries in varying reds from Holiday Medley, AQ55043.
- Iron two red fabrics together, back to back, to make them double sided. Cut 21 straight Feathers, AQ55008 in varying colours.
- From binding fabric cut 3 x 2 ½” strips.
- Green Fabric:
- Iron fusible webbing onto the back of the green fabric. Cut 5 Stems using the stem located in centre of Stems & Leaves die, AQ55331.
- Cut 12 Holly leaves from the Holiday Medley die, AQ55043.
- Yellow Fabric:
- Iron fusible webbing onto the back of the yellow fabric. Cut 9 circles from the Holiday Medley die, AQ55043.
- Red Fabric:
Sewing Instructions:
- Using the white piece of fabric, fold in half lengthwise and crosswise. Iron to find centre lines. Fold short ends into centre line, to find quarter marks, and iron, as illustrated below.

- Using the green stems, lay them along the long ironed line, matching ends of stems, and finishing approximately 10 cm from short edges of fabric. You may need to trim some off the stems to get them to fit nicely. Iron in place.

- Using the 21 single sided red feathers, divide into 3 groups of 7 for the three flowers. Using 7 feathers, arrange these in a circle at centre point as shown to create the flower. Iron in place.

- Repeat this process at the intersection of the two other fold lines to give you three flowers in total. Iron in place.
- Using the front photo as a guide, arrange the holly and berries along the stem, spacing evenly. Iron in place.

- Lay tearaway on wrong side of the white fabric, centring underneath the applique shapes. Starting with green embroidery thread, applique around all green fabric. NOTE: I chose to use a blanket stitch for applique, although other alternative stitches to use could be a satin stitch or a decorative stitch.
- Once completed, change to red thread and applique around poinsettias and holly berries.
- Using the 21 double sided petals, you can choose to leave these raw edge or for the more advanced sewer, applique around. I used the blanket stitch, no stabiliser, to stitch around, having the right hand of the stitch form on the edge of the petal, as shown right. A soluble stabiliser may also be used underneath petals if this is too difficult.

- Arrange 7 petals around each flower, so they are spaced evenly in between appliqued petals. Pin petals in place and straight stitch around the base of the petals to attach.

- Place three yellow circles in the centre of the poinsettia, making sure to cover any of the attachment stitches.
- Change to a Jeans needle and yellow thread and applique the centres – very slowly. This area is very thick and it is very easy to break a needle.
- Secure the tips of the freestanding petals by sewing a small straight stitch at the tips of the petals, pushing the petals back slightly. This will give dimension to the flower.
- Carefully remove the tearaway at the back of project.
Quilting and Finishing
- Layer wadding between quilt top and backing.
- Pin or baste layers together.
- Machine quilt with an all – over design.
- Trim top, measuring from centre, to 30cm (12”) x 110cm (43”)
- Attach Binding, mitring corners.
Congratulations on finishing your Poinsettia Table Runner
From everyone at AccuQuilt Australia, we wish you a Merry Christmas and we look forward to our journey together in the new year!