Patisserie is a Block Of The Month sampler quilt that has been exclusively designed to use with the Accuquilt GO! QUBE Mix & Match block sets. The great thing about the GO! QUBE Mix & Match sets is that while I’m using the 8” Block set for my pattern sample, you could just as easily use any size QUBE that you have as the shape numbers are all the same! You will just need to adjust the size of your fabric cuts accordingly.
This pattern was inspired by all those delicious cakes and pastries found at a patisserie, covered in delicately iced designs, and a glorious array of colour to behold. The quilt finishes at 36” x 46” using the 8” QUBE (30” x 38” with the 6” QUBE; 39” x 50” with the 9” QUBE; 48” x 62” with the 12” QUBE). I’m using a rainbow of solids from the Solids Club provided by The Creative Retreat, but your petit fours will look just as scrumptious in prints too!
Quilt finishes at 36” x 46”; individual blocks should measure 8.5” x 8.5”.Materials:
- AccuQuilt GO! Big, GO! Cutter or GO! Baby Cutter Fabric Starter Set
- AQ55776 GO! QUBE Mix & Match – 8” Block set
- AQ55137 GO! Cutting Mat 6 x 6
- 10 fat quarters
- 1.5m background fabric
- 35cm binding fabric
- 1.4m backing fabric
- 110cm x 135cm batting
- Rotary mat, cutter and ruler
- General sewing equipment
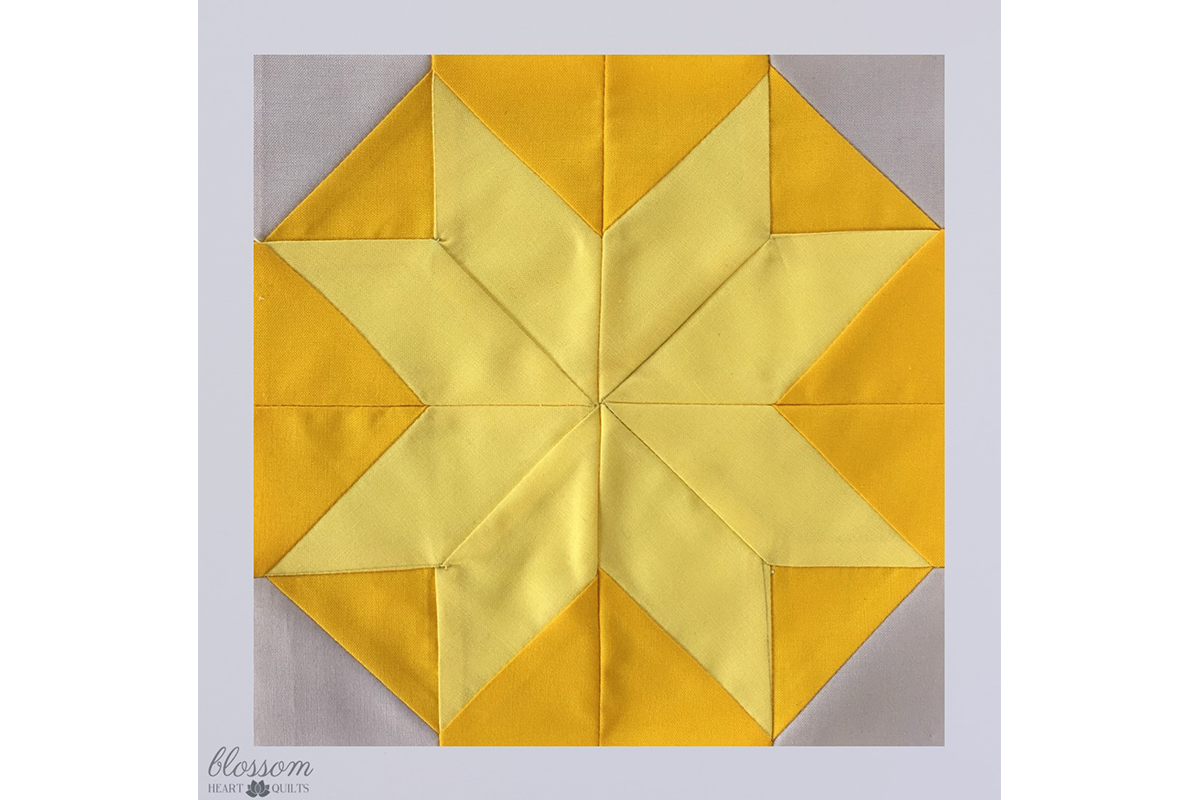
Block 12 Materials:
- Shape 5 Half-Square Triangle – 2” Finished
- Shape 7 Parallelogram – (2 1/16″ x 2 13/16″ Finished
- 2 contrasting fat quarters
- 5.5” x WOF background fabric
Cutting Instructions:
- From one fat quarter – Fabric 1 (dark):
- Cut two 3” x 14” rectangles
- Using Shape 5, cut twelve HSTs
- Cut two 3” x 14” rectangles
- From one fat quarter – Fabric 2 (light):
- Cut two 6” x 10” rectangles
- Using Shape 7, cut eight parallelograms
- Cut two 6” x 10” rectangles
- From background fabric:
- Cut one 3” x 7” rectangle
- Using Shape 5, cut four HSTs
- Cut one 3” x 7” rectangle
Sewing Instructions:
Note”All seams are ¼”, (6mm), unless otherwise specified.
- Following the diagram, use a temporary fabric marker to mark the ¼” seam lines on the wrong side of each Fabric 2 parallelogram (Shape 7). Four parallelograms will be one orientation, four will be the mirror image.
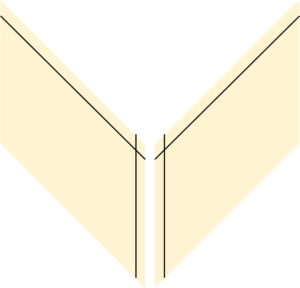

- Place one of each type of marked parallelogram right-sides together. Sew along the line along the short edge to where the lines intersect, and stop. Press the seam open.


- Use a temporary fabric marker to mark the ¼” seam lines along the right-angle edges on the wrong side of four Fabric 1 HSTs (Shape 5). Place one right-sides together with the left parallelogram as per the diagram. Sew along the line along the top edge to where the lines intersect, and stop, making sure to not sew into the other parallelogram (flipping the edge back will help). Press the seam open.
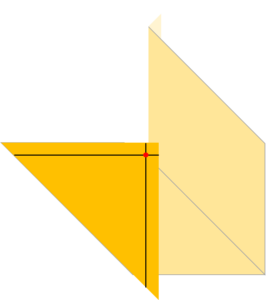

- Fold the unit right-sides together so that the remaining marked HST edge aligns with the edge of the second parallelogram and sew along the marked line to the point where the other two seams meet, and stop. Press the seam open.
- Sew a background HST, and two Fabric 1 HSTs to the corners to create a square unit. Make four.

- Arrange the four units to create the block layout. Sew the units into pairs and press the seam open. Sew the pairs together and press the seam open.
We can’t wait to see your blocks! Feel free to share them with us on Instagram, tagging @blossomheartquilts and @accuquilt_australia, and using the hashtags #blossomheartquilts and #accuquiltBOM. Join us next month for block 9!