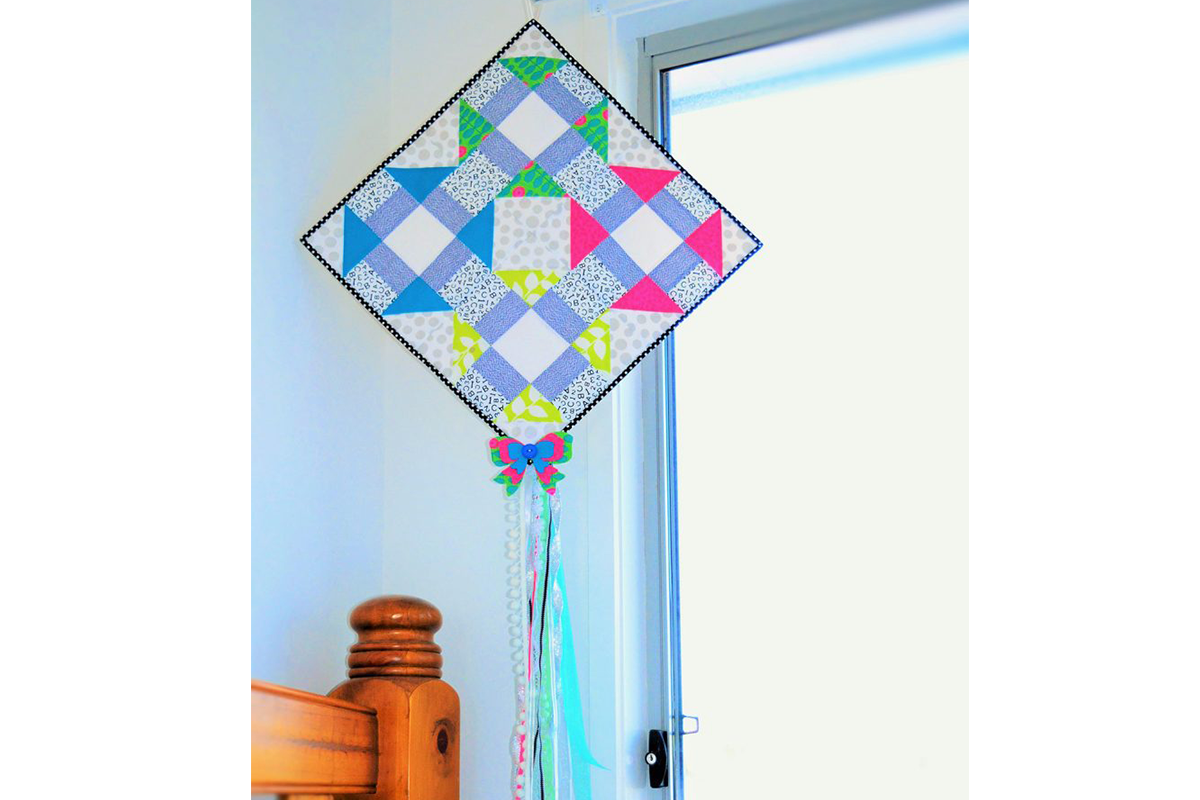
This Geometric Kite Wall Art will send imaginations soaring through the clouds! A perfect modern style kids bedroom decoration for fun adventures inside!
Materials:
- AccuQuilt GO! Baby, GO! Cutter or GO! Big
- AQ55341 GO! Bow-2 1/2″, 3 1/2″, 4 1/2″
- AQ55339 GO! Churn Dash – 9″ finished
- one of the following strip cutter:

- Cutting mats to suit your dies above
- Fabric 1 – fat eighth
- Fabric 2 – fat eighth
- Fabric 3 – fat eighth
- Fabric 4 – fat eighth
- Fabric 5 – fat eighth
- Fabric 6 – fat eighth
- Fabric 7 – fat eighth
- Fabric 8 – fat eighth
- Fabric 9 – 65cm (backing and binding)
- Heat & Bond Ultra
- 1/2 metre Pellon
- Mixture of ribbons/trims at varying lengths
- (1) Button
Cutting Instructions:
- Fabric 1: Cut (4) 3″ finished half square triangles
- Fabric 2: Cut (4) 3” finished half square triangles
- Fabric 3: Cut (4) 3” finished half square triangles
- Fabric 4: Cut (4) 3” finished half square triangles
- Fabric 5: Cut (4) 3 ½” squares
- Fabric 6: Cut (16) 2” x 3 ½” rectangles
- Fabric 7: Cut (16) 2” x 3 ½” rectangles
- Fabric 8: Cut (16) 3” finished half square triangles
- Fabric 9:
- Cut (2) 2″ strips
- Cut (1) 20″ square

Diagram 1

Sewing Instructions
Note: All seams are 1/4″. Press seams toward the darker fabric.- Join (1) Fabric #6, 2” x 3 ½” rectangle to the long edge of each Fabric #8, 2” x 3 ½” rectangle (refer to diagram 1). Make 16 rectangular units.
- Join (1) Fabric #1, 3” finished half square triangle and (1) Fabric #7, 3” finished half square triangle along their long edges to make a half square triangle unit (refer to diagram 2). Make (4) half square triangle units. Repeat step 2 for Fabrics #2, #3 & #4 (refer to diagram 3).

- Lay out (4) rectangular units, (4) matching half square triangle
units, and (1) Fabric #5, 3 ½”square in three rows (refer to diagram 4). Pin and sew the pieces into rows and then Join the rows to make one Churn Dash unit. The unit should measure 9 ½” x 9 ½”. Make (4) units with each colour (refer to diagram 5).
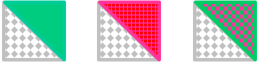
Diagram 3


Mini Quilt Assembly:

- Lay out the (4) Churn Dash quilt blocks (refer to diagram 6). Pin and sew together.
- Cut Pellon to the same size as the mini quilt and iron onto the wrong side.
- Place the backing fabric behind the Pellon and quilt each block as desired.
- Trim excess backing fabric and add Fabric #9 binding strips using your favourite binding technique!
- Cut a 2” x 4” rectangle from Fabric #9 and fold in half to create a 2” square, press. Cut lengths of various ribbons and layer one end of each ribbon inside the square of fabric. Sew using a zigzag stitch around the square to hold the ribbons in place (refer to diagram 7). Attach to the wrong side of the mini quilt, in the bottom corner to create the kite tail. Hand sew or glue into position.
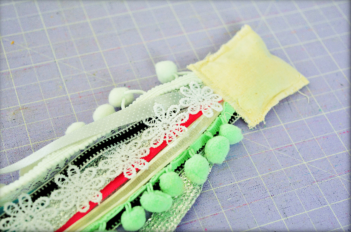
Diagram 7 - Fuse pieces of your fabric scraps together by ironing Heat & Bond to the wrong side, removing the paper backing and then ironing a second piece of fabric on top (right side facing up). Using AQ55341 GO! Bow-2 1/2″, 3 1/2″, 4 1/2″ cut out the desired bows from the fused fabric. Layer the bows and position a bottom on top, then sew onto the bottom corner of the mini quilt (refer to diagram 8).
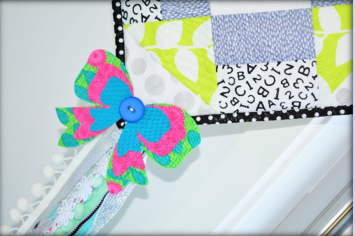
Diagram 8 - Hand sew a looped piece of ribbon onto the top corner of the wall kite (wrong side) and your kit is ready to hang!

