Use up your Christmas scraps to make this quick and easy Santa Stocking!
Materials:
- AccuQuilt GO! Big or GO! Fabric Cutter
- AQ55854 GO! Santa Stocking Die
- AQ55059 GO! Square – 2 1/2″ (2″ Finished) Multiplies
- Scrappy Christmas Fabric
- 50cm White Fabric for Cuffs and Lining
- 6” Piece of Ribbon
- Sewing Machine
- Matching Sewing Thread
- General Sewing Tools
Cutting Instructions:
- From assorted Christmas scraps:
- Using AQ55059 GO! Square – 2 1/2″ (2″ Finished) Multiplies
- Cut (60) squares
- Using AQ55059 GO! Square – 2 1/2″ (2″ Finished) Multiplies
- From White lining fabric
- Using:
- Cut (2) stocking shapes
- Cut (4) cuffs AQ55854 Go! Santa Stocking Die
- Using:
Sewing Instructions:
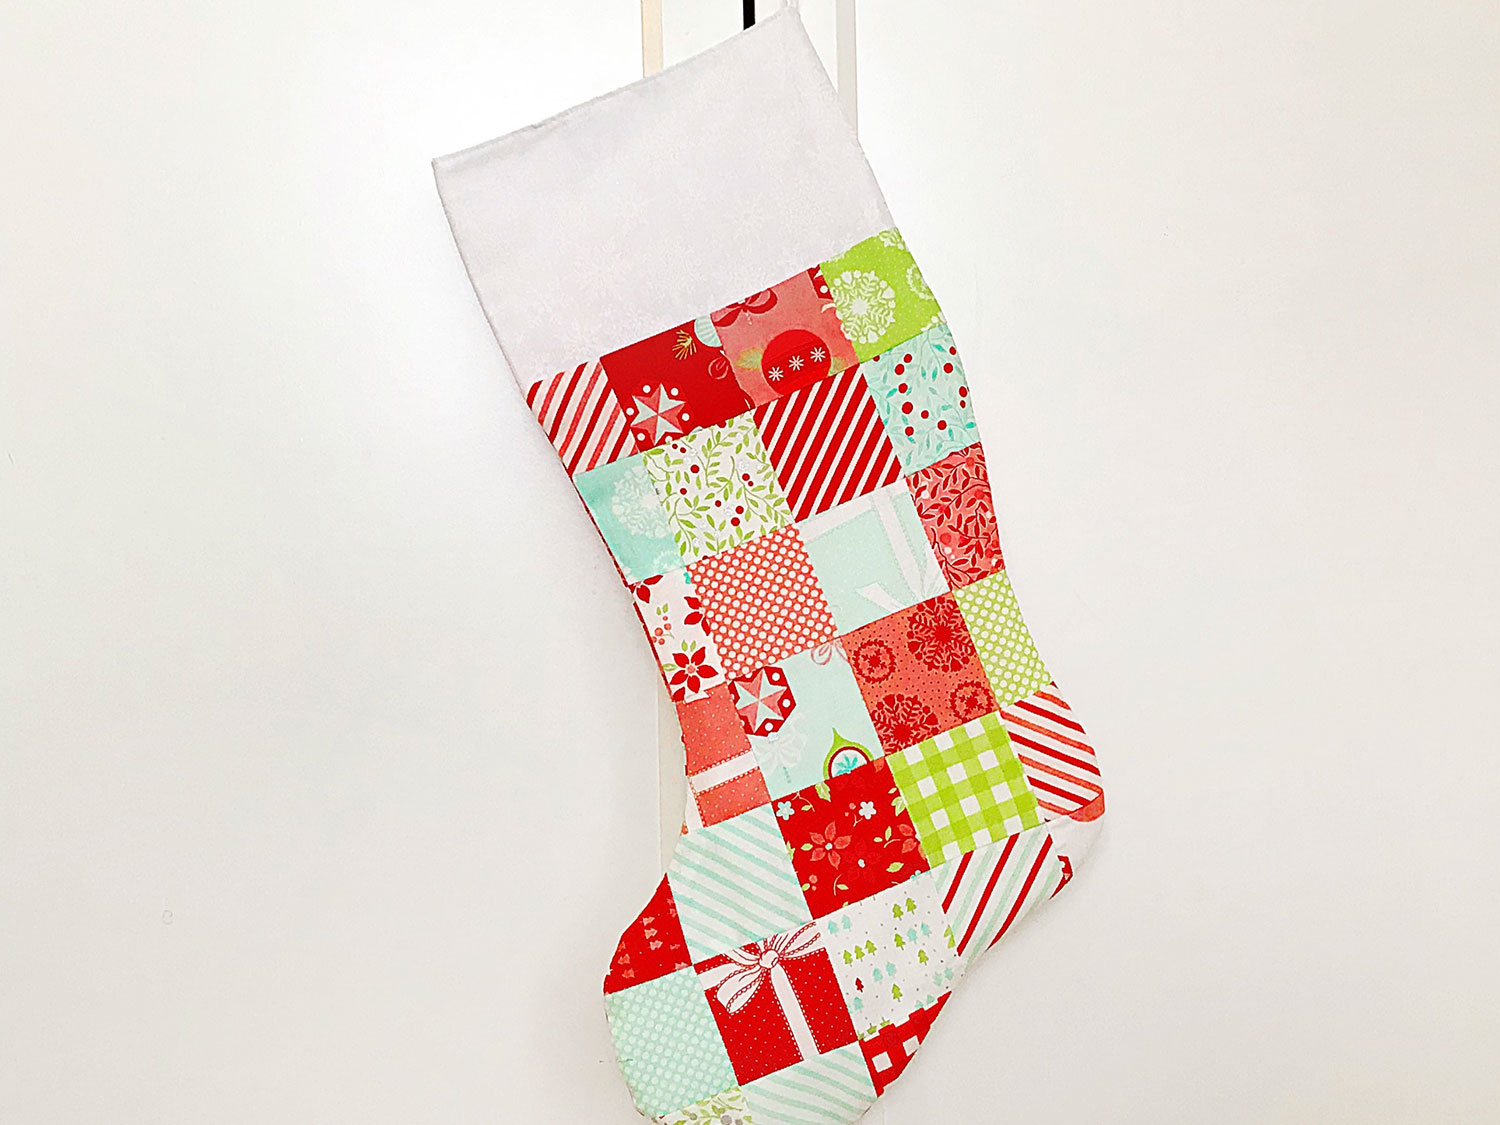
All seams are ¼” unless otherwise specified.Sew the Scrappy Stocking
- Divide the 2 ½” scrappy squares into two piles of (30) each.
- Lay the squares out as in the picture below, then sew them together to make one of each shape. Press the seams open.

- Place the scrappy shape A on the AQ55854 Go! Santa Stocking Die right side up (see diagram) and cut it out.

- Place the scrappy shape B on the AQ55854 Go! Santa Stocking Die right side down (see diagram) and cut it out

- Sew a cuff to each of the scrappy stocking shapes by placing them right sides together. Press away from the cuff.

- Sew the scrappy stocking right sides together. Turn them inside out and press well.
Sew the Lining:
- Sew the lining cuffs and stocking together
- Place the stocking pieces right sides together and sew, leaving a four-inch opening on one of the side seams. Press, but do not turn inside out.
Assemble the Scrappy Stocking:
- Fold the ribbon in half and pin to the back seam on the right side of the lining. The loop should be facing down into the stocking.
- Place the scrappy stocking inside the lining, right sides together. Pin along the top and sew. Sew back and forth a few times where the ribbon is, to strengthen it.
- Turn the stocking right side out and tuck the lining into the scrappy stocking. Press and top stitch.