Whether it’s a party, baby shower, wedding or a child’s room, you can now dress up any occasion, with the new GO! Pennants Die. Debbie Lomas walks you through some different techniques for different occasions, with some no-sew options! Play, experiment and learn using different fabrics to find that exact look you are after!
Materials:
The first 5 items are needed for each project but depending on the version you would like to make, depends on the auxiliary dies needed to decorate the bunting.
- AccuQuilt GO! Big, GO!, GO! Baby or GO! Me Fabric Cutter
- AQ55149 GO! Pennants
- AQ55112 GO! Cutting Mat 6” x 12”
- Sewing Machine
- General sewing tools including matching thread
Foxing Around Bunting
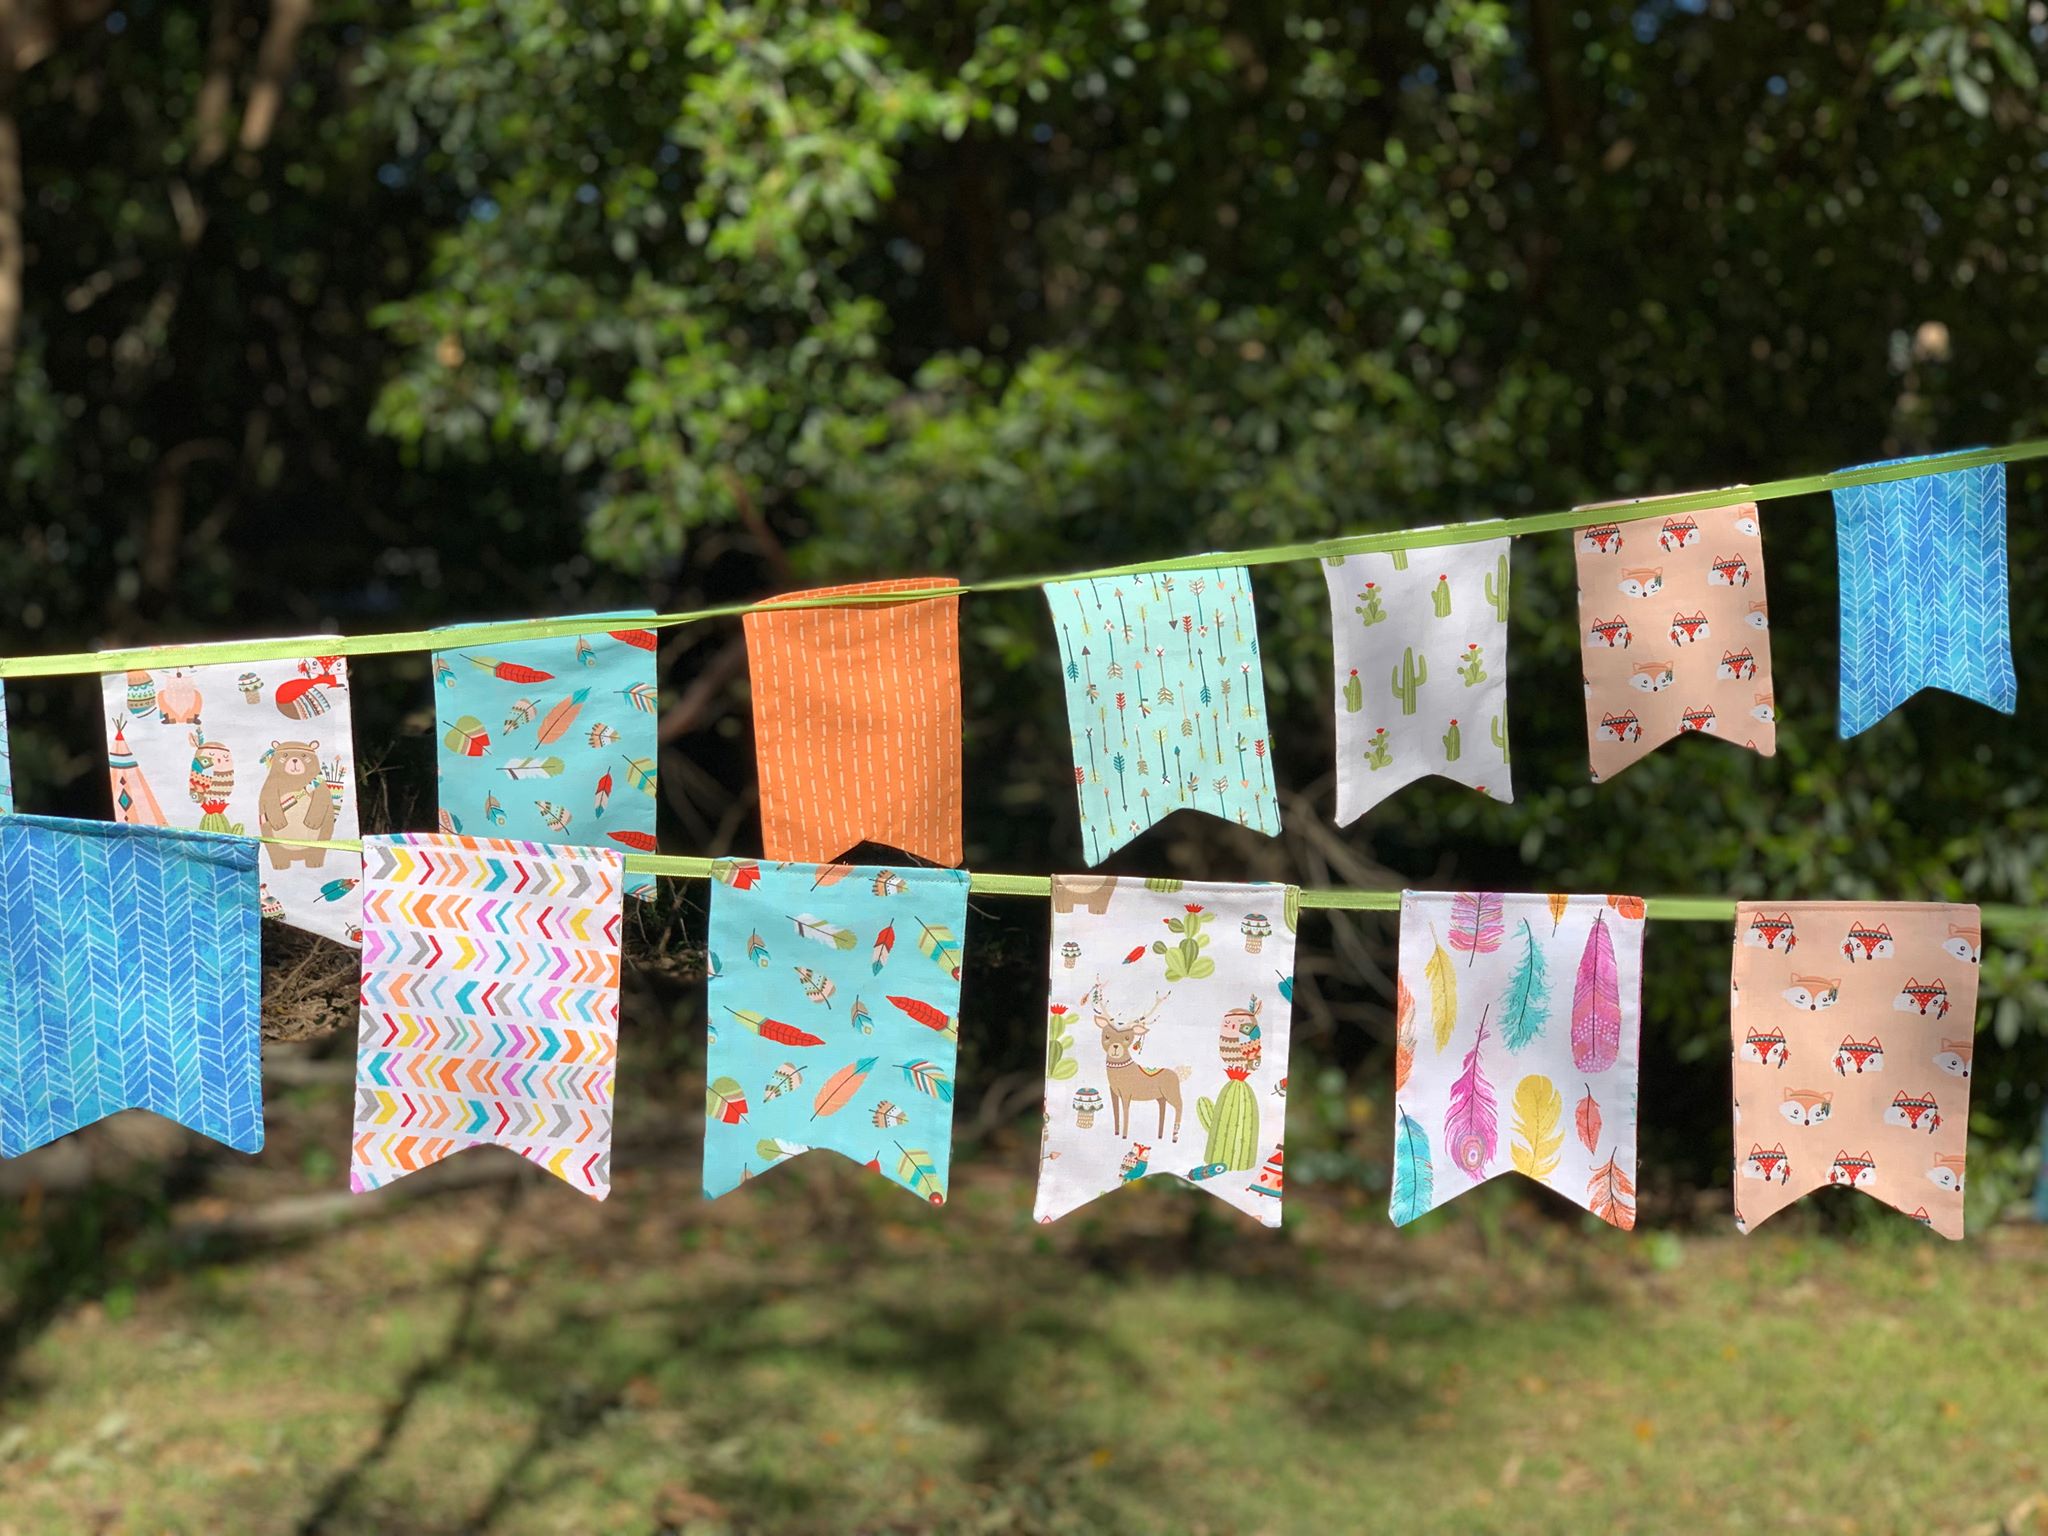
Materials:
- 10 x Fat eighths cotton fabrics
- 4m (4 ½ yds) of 15mm (5/8”) green ribbon
Cutting Instructions:
- Using the Fat Eighth’s cut (4) Swallow Tail pennants in each fabric. You will need 40 pennants.
Sewing Instructions:
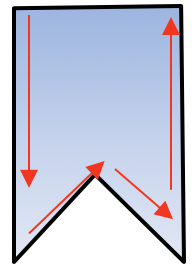
- Using (2) of the same fabrics, with right sides together, sew 6mm (1/4”) around the outside edge of each Pennant leaving the top open
- Carefully trim points and clip into all corners.
- Turn Pennant right sides out, and using a point turner, carefully push corner to create a point. Press.
- Turn top edge opening under 6mm (1/4”) and press.
- Using green ribbon, measure 40cm (16”) from start. Mark. Sew one pennant along the top, approx. 3mm (1/8”) from the top edge, backstitching at the start and end. Measure 5cm (2”) from the end of the pennant and sew the next pennant. Repeat until all pennants are sewn to ribbon. Measure 40cm (16”) from the last pennant and cut excess ribbon off.
Congratulations on finishing Foxing Around Bunting
For Shabby Chic Blushing Love Bunting
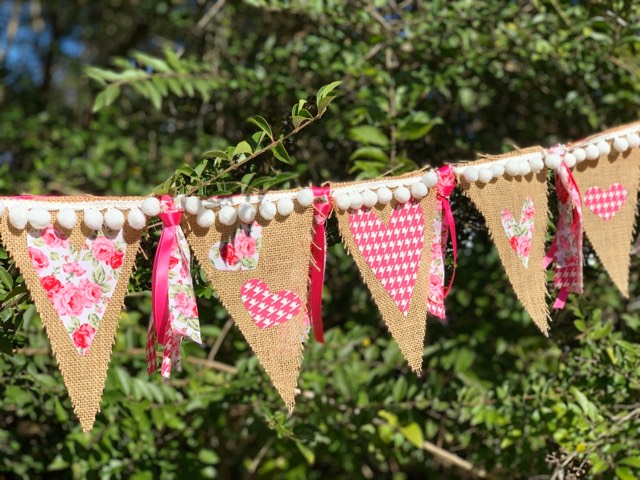
- AQ55325 GO! Queens of Hearts
- AQ55137 GO! Cutting Mat 6” x 6”
- AQ55052 GO! Strip Cutter -1” (1/2” Finished)
- 20cm (8”) of hessian fabric
- 20cm (8”) x (2) pink cotton fabrics.
- 1½m (1.1yd) of Pom Pom trim cut into 13cm (5”) lengths
- 4m (4½ yds) of 12mm (½”) pink ribbon
- 10cm (4”) of fusible web.
Cutting Instructions:
- From hessian fabric:
- Using AQ5519 cut (11) Triangle Pennants. Tip – To conserve on fabric, flip fabric after each cut to ‘nestle’ the triangles
- From pink cotton fabrics:
- Using AQ55325 -Apply 25cm x 40cm fusible web to the wrong side of each pink cotton fabric. Cut an assortment of (22) the top three heart shapes. (The bottom heart is too large and will not fit onto the bunting.)
- Using AQ55052 – Cut (10) x length of fabric.
- From Pink Ribbon – cut (10) x 20cm (8”) lengths
Sewing Instructions
For the ‘No Sew’ version, apply craft glue wherever it says ‘Stitch”
- Remove fusible web backing paper and iron each love heart onto a triangle pennant. You may like to play with the placement and add two or more to the pennant. Machine stitch in place if desired.
- Snap on zipper foot and sew a length of pom pom trim to the top of each pennant.
- Using the pink ribbon, measure 40cm (16”) from start. Mark. Sew one pennant along the top, backstitching at the start and end. Measure 5cm (2”) from the end of the pennant and sew the next pennant. Repeat until all pennants are sewn to ribbon. Measure 40cm (16”) from the last pennant and cut excess ribbon off.
- Using (1) of each of pink fabric and (1) piece of ribbon, the knot in between each pennant.
Congratulations on finishing Shabby Chic Blushing Love Bunting
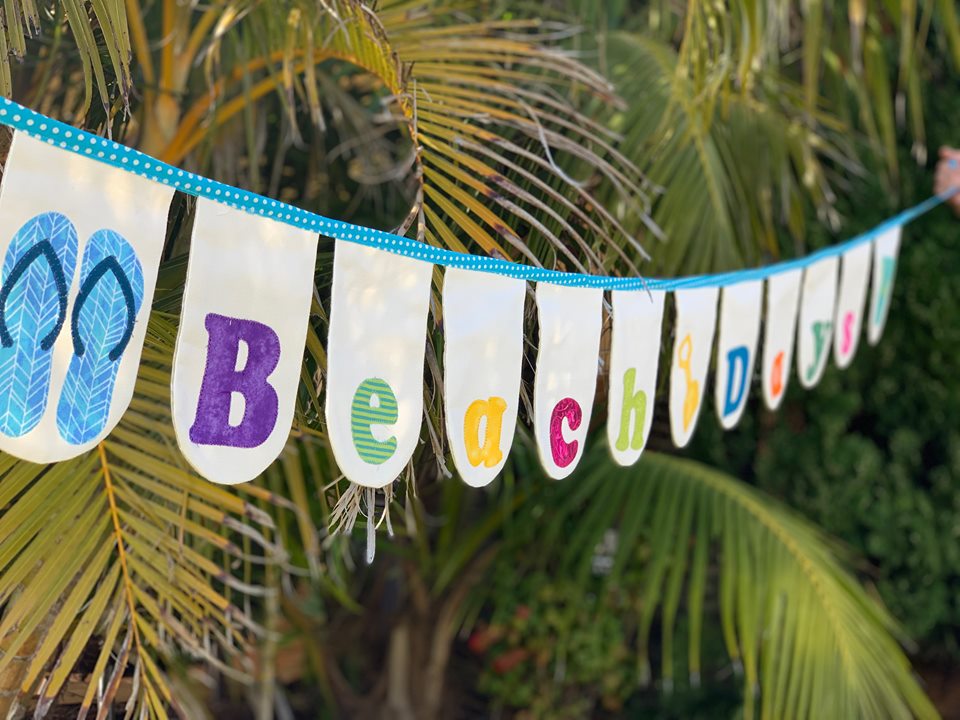
Lazy Beach Days Bunting
Materials:
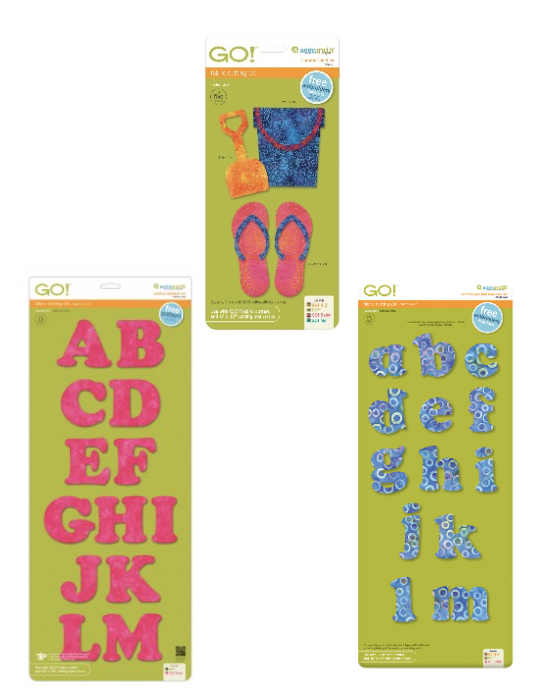
- AQ55496 GO! Summer Medley
- AQ55092 GO! Carefree Alphabet Uppercase Set
- AQ55491 GO! Carefree Alphabet Lowercase Set
- 40cm (16”) of duck weave fabric, light canvas or similar
- 60cm (24”) of cotton fabric for the backing
- An assortment of fabric with a fusible web attached, large enough to cover shapes, for applique.
- Embroidery thread to match cotton colours above.
- 40cm (16”) Tear-away stabiliser
- 3m (3.3yds) bias binding
Cutting Instructions:
- From duck weave fabric:
- Cut (2) 20cm (8”) x width of fabric (WOF).
- Cut (12) x AQ55149 Rounded Pennants
- Cut (2) 20cm (8”) x width of fabric (WOF).
- From cotton backing fabric:
- Cut (3) 20cm (8”) x WOF
- Cut (12) x AQ55149 Rounded Pennants
- Cut (3) 20cm (8”) x WOF
- From assorted fabrics:
- Using AQ55496 GO! Summer Medley
- Cut (2) x Sandal
- Cut (2) x Sandal strap
- Cut (1) x Bucket
- Cut (1) x Bucket Strap
- Cut (1) x Shovel
- Using AQ55092 GO! Carefree Alphabet Uppercase Set
- Cut (1) of each of the following letters ‘B’ & ’D’
- AQ55491 GO! Carefree Alphabet Lowercase Set
- Cut (1) of each of the following letters ‘e’, ‘a’, ‘c’, ‘h’, ‘a’, ‘y’ & ‘s’
- Frome tearaway stabiliser:
- Cut (2) 20cm (8”) x WOF
- Crosscut into (12) 15cm rectangles
- Cut (2) 20cm (8”) x WOF
Sewing Instructions:
- On the duck weave rounded pennants, arrange the applique shapes as illustrated in the picture.
- Place tearaway under each pennant. With a small zig-zag, satin, blanket or motif stitch, sew around each shape.
Alternatively, you can use the FREE embroidery downloads of GO! Carefree Alphabet Lowercase Embroidery Designs, GO! Carefree Alphabet Uppercase Set Embroidery Designs and GO! Summer Medley Embroidery Designs
- Remove tearaway from the back of the bunting
- With right sides together, using a 6mm (1/4”) seam, stitch down the side, around the bottom edge and back up the side of the pennant and the backing fabric, leaving the top open.
- Clip all curves and turn right sides out. Press.
- Arrange the bunting in the order to say “Beach Days’ with you the graphic designs at shown.
- Using the bias binding, start sewing the folded bias until you are 40cm (16”) from start. Insert one pennant in between folded bias and sew along the to Continue sewing 5cm (2”) from the end of the pennant and insert the next pennant and sew. Repeat until all pennants are sewn to bias. Measure 40cm (16”) from the last pennant and cut excess bias binding off.