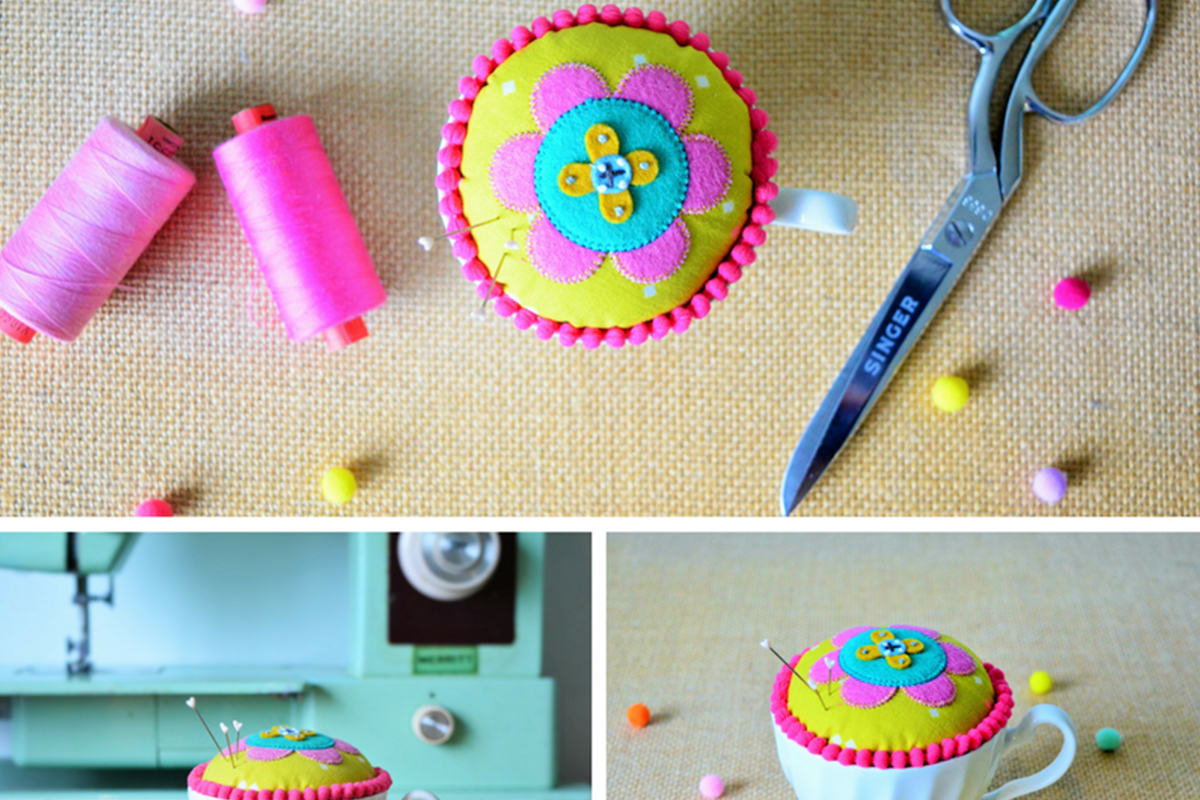
The Flower Shapes die included in the GO! Qube Specialty Set – Serendipity by Edyta Sitar are perfect for wool felt appliqué projects, like this In Bloom Teacup Pincushion.
Create a lovely gift for your sewing friends with this quick and easy tutorial
Materials:
- AccuQuilt GO! Big, GO! Cutter or GO! Baby
- GO! Qube Specialty Set – Serendipity by Edyta Sitar
- 10” circle of cotton fabric
- 10” circle of fusible woven interfacing
- (4) contrasting colours of wool felt scraps
- Fusible web
- 30cm mini pompom trim
- Fabric glue
- Stuffing
- Elastic band
- Embroidery threads or embroidery floss
Cutting Instructions:
Please note:Before cutting out shapes, iron fusible web onto one side of the felt.
Sewing Instructions
- Begin by fusing the woven interfacing to the wrong side of the 10” fabric circle.
- Layer the felt pieces (fusible side down) onto the right side of the fabric circle, as per diagrams 1 & 2.

- Appliqué around the felt shapes either by hand or using a sewing machine. I used a 2mm x 2mm blanket stitch on my machine to stitch around the large flower and large circle.
- Then, using embroidery floss stitch a cross in the centre of the small circle. Stitch French knots on each petal of the small flower and around the small circle, as per diagram 3.

- Place the circle unit, right side facing down into the teacup and fill tightly with stuffing.
- Grab the excess fabric of the circle and pull together to create a ball. Secure tightly with the elastic band. Ensure you smooth out as many lumps and pleats as you can.
- Test to see it fits nice and snug into the teacup (the right way up).
- Once you’re happy with the fit, secure around the elastic band with some hand sewn stitches. You can now remove the elastic band (if desired).
- Place fabric glue approximately 1cm from the rim of the teacup and then insert the pincushion.
- Place some glue along the flat edge of the trim and push it down between the pincushion and the teacup.
