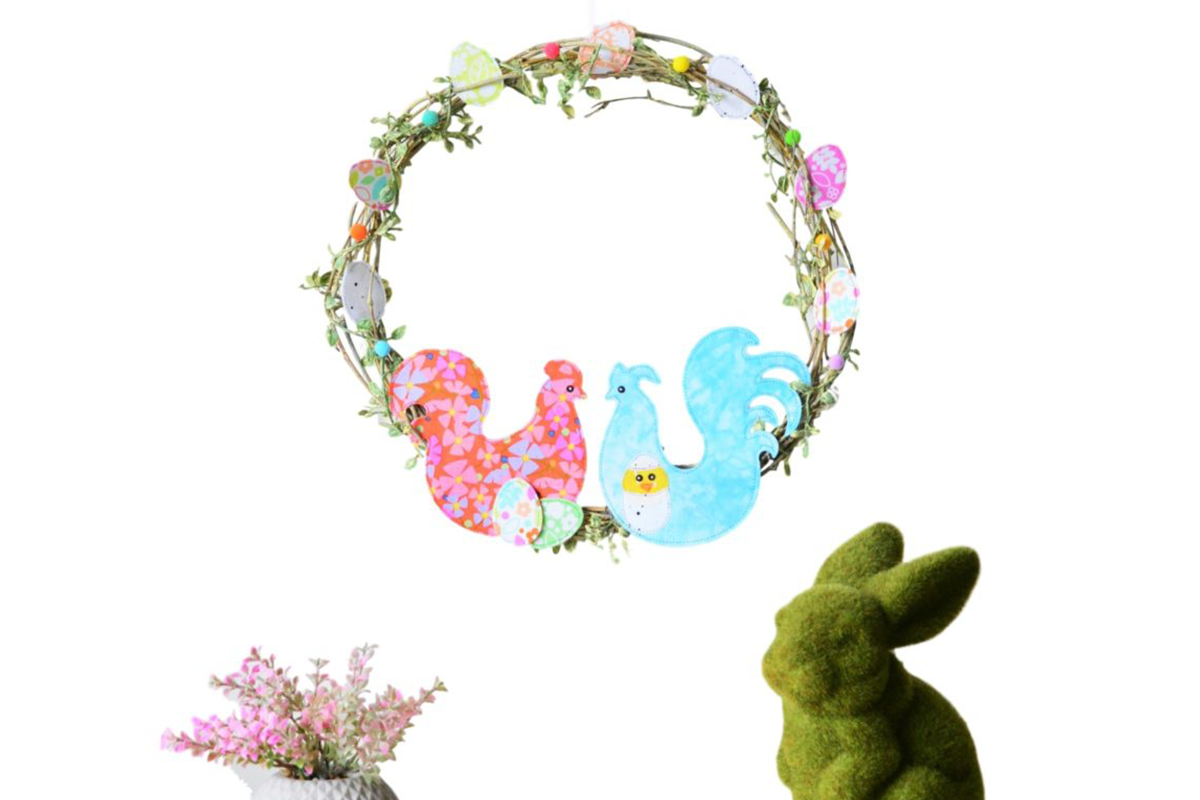
Easter lunch will be eggcellent with this gorgeous Easter wreath decoration. Your guests will have something to cluck about when they find out you made it yourself! Check out this free tutorial and create your own Cluck, Cluck Easter Wreath.
Materials:
- AccuQuilt GO! Baby, GO! or GO! Big Fabric Cutter
- AQ55375 GO! Folk Art Fowl by Bill Kerr
- AQ55037 GO! Baby, Baby
- AQ55326 GO! Crazy Petals
- AQ55137 GO! Cutting mat – 6” x 6”
- A3 white stiffened felt sheet
- 40cm Fusible web (Heat n Bond Ultra)
- (2) 6” x 6” squares of fabric for Hen
- (2) 6” x 6” squares of fabric for Rooster
- 2” x 2” square yellow fabric for baby chicken
- ½” x ½” square of orange felt for chicken beak
- (19) 2” x 2” squares of assorted fabrics for eggs
- 1” x 1” square of black fabric for eyes
- 30cm Metal ring
- Fake vine
- 30cm Jewellery wire
- Mini Pompoms
- 60cm Ribbon
- Glue gun and glue sticks
- White embroidery floss
- Sewing machine with associated tools and notions.
- Assorted threads to match fabrics.
Cutting Instructions:
- Using a rotary mat, cutter and ruler, prepare the stiffened felt sheet by cutting to the following sizes:
- (2) 6” x 6” squares
- (9) 2” x 2” squares
- From the fusible web, cut the following:
- (4) 6” x 6” squares
- (18) 2” x 2” squares
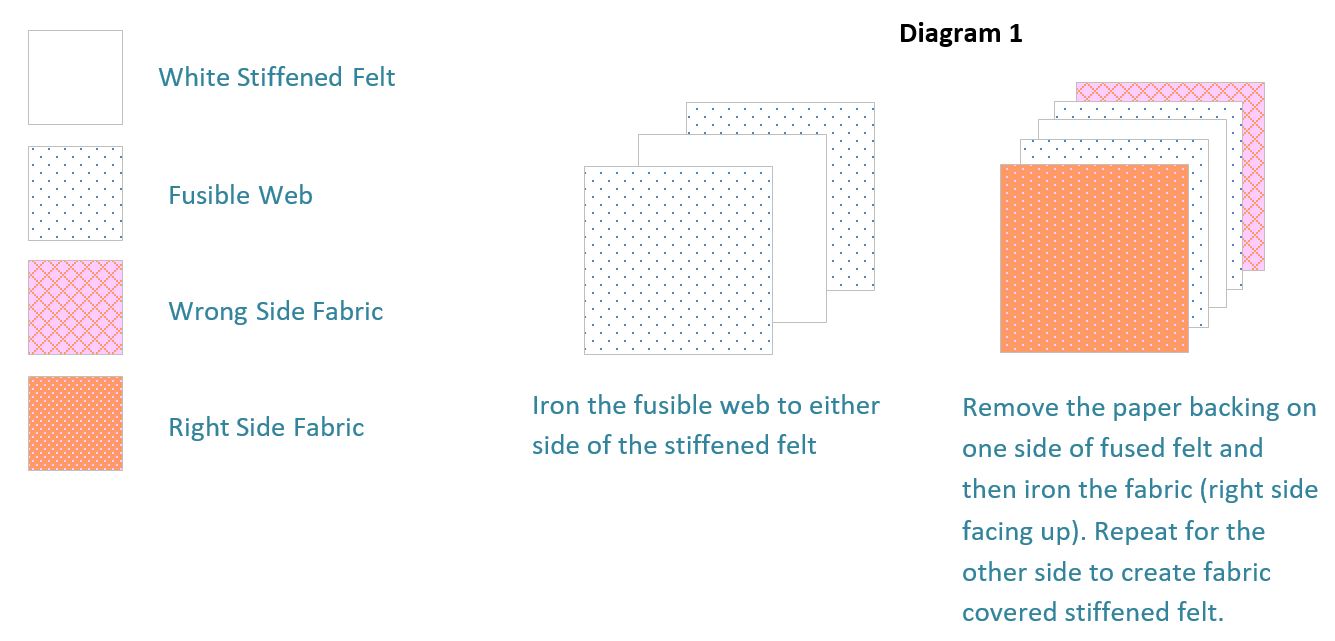
- Using a 2” square of stiffened felt, iron a 2” square of fusible web to both sides of stiffened felt sheet. Let cool and remove one side of the paper from the fusible web. Place the egg fabric right side up and fuse together with the iron. Repeat for opposite side. Repeat this step until you have (9) 2” x 2” squares of fabric covered stiffened felt (Refer to diagram 1).
- Follow step 3 for the 6” x 6” pieces, attaching the hen fabrics. Repeat for rooster fabric until you have (2) 6” x 6” fabric covered stiffened felt.
- Using AQ55375 GO! Folk Art Fowl by Bill Kerr die, cut the following:
- (1) Hen from a 6” square
- (1) Rooster from a 6” square
- (9) Egg shapes from 2” squares
NOTE: Due to the thickness of the fabric, cut only one shape at a time.
- To create the baby hatching chicken, prepare the fabrics by ironing fusible web to the wrong side of the yellow, orange and egg fabrics.
- Using AQ55375 GO! Folk Art Fowl by Bill Kerr die, cut one egg shape.
- Using AQ55326 GO! Crazy Petals, cut one yellow circle, using the largest circle.
- For the beak on the baby chicken, hand cut a small triangle shape.
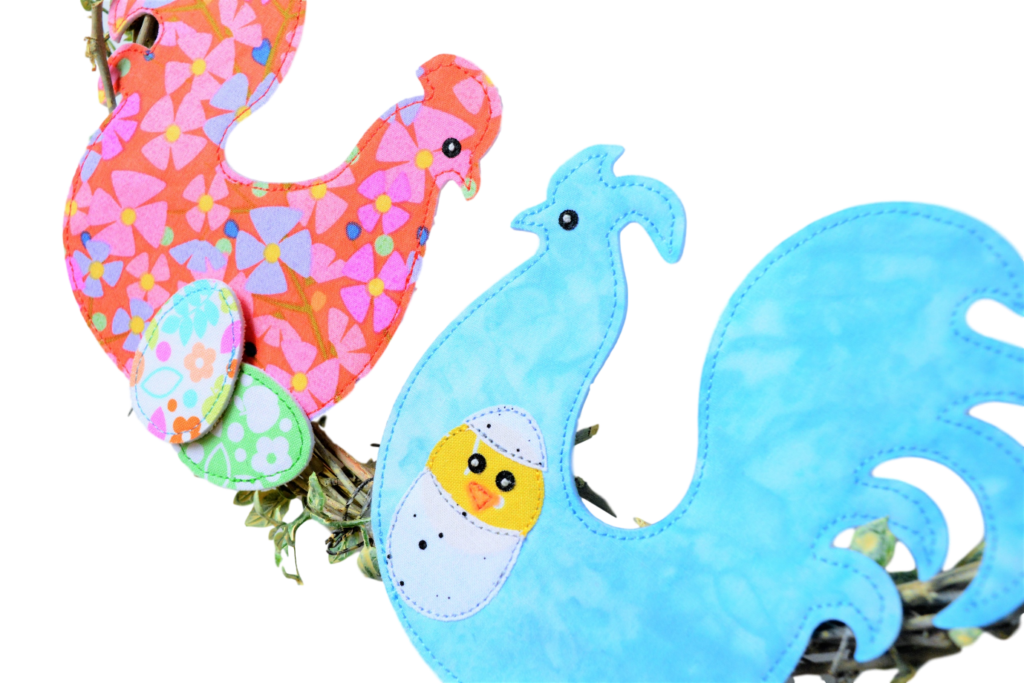
- Referring to image of the hatching chicken below, free hand cut the egg shape with a slight curve, approximately 5/8” from the top. With right sides of fabric facing up, position the pieces on the rooster in the following order:
- Place the circle piece first
- Place egg shell on top. You may need to trim it down until the circle shape you cut out fits nicely for the chicken coming out of the egg.
- Lay the beak on top of circle. Fuse all in place with an iron.
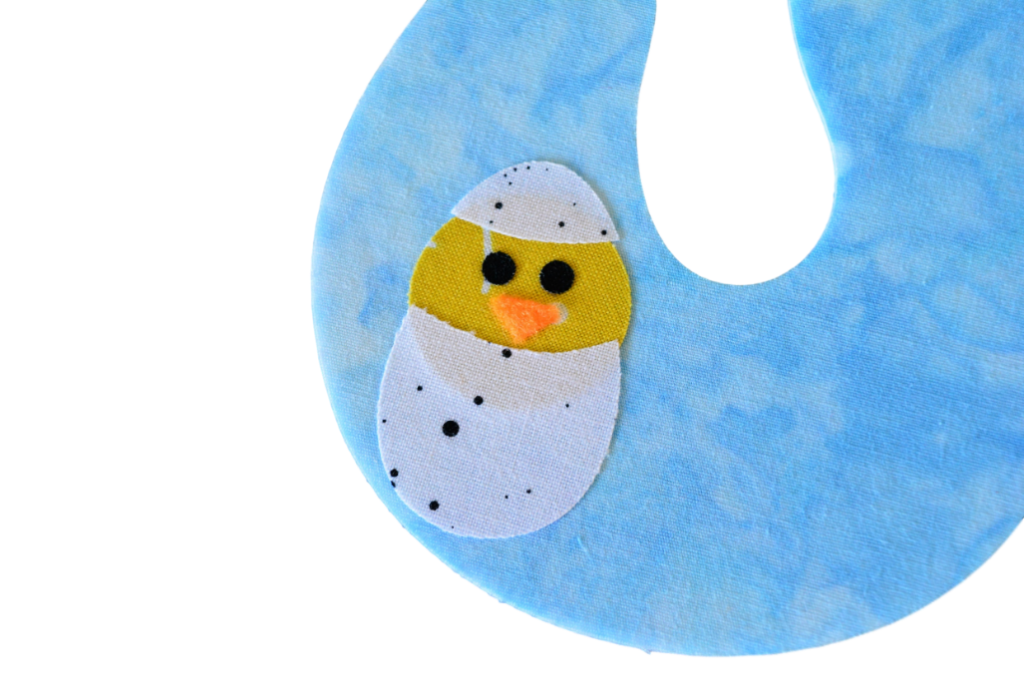
- Iron fusible web to the wrong side of the black fabric. Cut (4) circles from AQ55037 GO! Baby, Baby die. Fuse an eye onto both the hen and rooster and then (2) for the baby chicken, just above the beak.
Sewing Instructions:
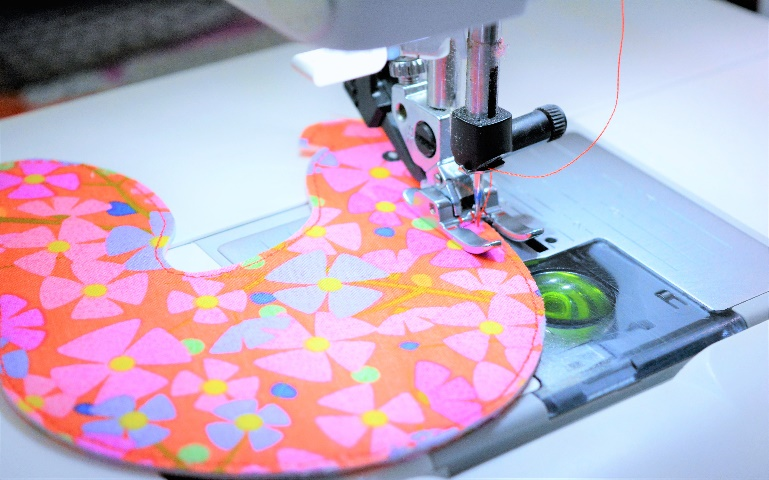
- On your sewing machine, select straight stitch, adjusting length to 2mm. Raw edge applique the baby chicken approximately 2 mm from edge.
- Repeat this method for all other shapes.
- Using (2) strands of the white embroidery floss and a hand sewing needle, stitch a French knot in the centre of each eye. This gives a fleck and also holds the tiny black circle in place.

- Wrap the fake vine around the metal ring and secure in place with wire.
- Position the hen and the rooster at the bottom of the hoop. Hot glue in place.
- Add (2) of the stiffened felt egg shapes at the base of the hen and hot glue in place.
- Scatter the egg shapes around the outside wreath, entwining them amongst the vine.
- Position the mini pompoms between the eggs and hot glue everything in place.
- Thread the ribbon through the top of the ring and tie the ends together. Your Easter Wreath is ready to hang.
Congratulations on finishing your Cluck, Cluck Easter Wreath!